Utilities
For 12 short recorded trainings on a Product Overview and doing Product Setup, click here.
This chapter contains directions on setting up defaults and configuring Trams Back Office for the agency, as well as the use of other features listed under Utilities:
User Profiles
To protect the security of the Trams Back Office system for the agency, each person using Trams Back Office is assigned a User Profile. Each User Profile in Trams Back Office is unique, authorizing different levels of access for each user. The user is prompted for a Login, and Password when launching the Trams Back Office program. Trams Back Office assumes there is one person who acts as a gatekeeper for access to all levels of Trams Back Office. The “gatekeeper” limits who can get into the agency’s financial records, payroll information, or commission amounts. Assigning passwords and login names are the way to accomplish different levels of access.
We recommend that each person who uses Trams Back Office has a login with their own name, and that no one shares a login. This creates an “audit trail” and gives the agency manager the ability to ascertain who accessed the Trams database and what changes were made.
User Profile Authorization Levels – SYSDBA, Manager and User
SYSDBA Profile
The Trams Back Office program comes with one Administrator Profile built with an Authorization level of SYSDBA. By default, this User Profile's Login Code is SYSDBA and uses the password which came in the welcome e-mail to the agency. For security purposes, the SYSDBA default password should be changed during the installation process.
The SYSDBA profile is used to create, modify or delete other User Profiles. It can access the Help menu, access the File menu, reset its own password, and create users with Manager Authorization under Utilities | Setup | User Logins. In order to perform other managerial functions, your agency will need to create a user profile with the Authorization level of Manager.
Only one User Profile can be established with an authorization level of SYSDBA. Why? Trams Back Office assumes the System Database Administrator is the only one that needs to know the passwords for all users, any sensitive payroll information, etc. The SYSDBA sets permission levels for all users, preventing all or selected users access to any sensitive agency information. Set all other User Profiles to User authorization. An unlimited number of User Profiles can be set up and each can be tailored to authorize access to specific areas in Trams Back Office.
The SYSDBA login name cannot be changed. Agency staff members requiring access to Trams Back Office should each be assigned a unique profile and password.
If a new password is not assigned to the SYSDBA Profile and no additional User Profiles are created, anyone entering the Trams Back Office system is, by default, signed in as a Manager with full access to every area of the program. Passwords provide security.
When creating new User Logins, be sure to review the Menu Items and Permissions tab options and adjust them according to the tasks the User will be performing. If the User will be downloading and processing interface records, they will need both the “View Full Credit Card Numbers” and “Run Reports/Export with full Credit Card Numbers and view REC LOC content” permissions enabled.
User Logins created in ClientBase Windows are marked as disabled in Trams Back Office and have no Trams Back Office permissions by default
Changing the SYSDBA Password
To change the SYSDBA password in TBO, go to Utilities|Setup|User Profiles. Highlight the User Name, SYSDBA, enter the new password and click Update. Warning: Take care when entering the password, as there is not a prompt to repeat the password. Make sure to write the password down for reference.
Please be aware that if your agency is on InterBase XE or earlier, you are limited to 8 characters in a password. (Longer passwords are saved, but all characters after the eighth are ignored.) We recommend that you upgrade to a current version of InterBase.
Manager Profiles
Except for Database Backup, which requires SYSDBA, a Manager log-in can do all the things that SYSDBA could do previously. Some functions, for example, creating or modifying user logins, will prompt the Manager to enter the SYSDBA password before allowing them to proceed. However, they are still logged in under their own user login.
If you have scheduled tasks that use the SYSDBA login, you will need to update them to use the Manager's username and password.
User Profiles
An unlimited number of User Profiles can be set up and each can be tailored to authorize access to specific areas in Trams Back Office. While an unlimited number of profiles can be created, the number of profiles concurrently signed into Trams Back Office will be determined by the number of user licenses in the agency’s contract. If you require additional user licenses, please contact your account manager6?"
Password Protection for TBO Users on InterBase XE or Higher
User Permission Security Enhancements (only available with Interbase XE or higher):
- Enable User Authentication for login security settings for password management. EUA enabling the database allows benefits from the new password management features of setting password strengths, setting password expiration dates, as well as users being able to change their own passwords.
- All user login password security enhancements are strictly tied to EUA enabling the database. If a database is not EUA enabled, Trams Back Office user login password management remains unchanged and only SYSDBA can update User Login passwords.
EUA REQUIREMENTS
|
• |
IB Server and IB Client must be on IB version XE or higher. |
|
• |
The ClientBase/Trams Back Office database must be updated to IB XE or higher. |
|
• |
Trams Back Office table version must be DB version 37 or higher (3.3) |
|
• |
ClientBase Windows table version must be DB version 99 or higher (3.6) |
EUA ENABLING A DATABASE
To EUA enable the database a special command line prompt: cbplusup.exe –eua must be used when running the CBPlusUP. When the command line prompt is used, if the above requirements are not met the user is prompted,
The following requirements must be met to EUA enable the database:
- Database Server version must be upgraded to version “10” or greater. The current version is “X”.
- Database File version must be upgraded to version “15” or greater. The current version is “X”
- Database Client version must be upgraded to version “10” or greater. The current version is “X”
Please verify these requirements are met and try EUA enabling again.
If the requirements for EUA enabling the database are met the user is prompted, You have the option of using Embedded User Authentication. Your user logins and passwords will now be directly tied to your database file. Enable EUA?
- Help|About includes a new entry: EUA Enabled Yes|No
Upon EUA enabling a database all User Login passwords are converted and stored within the database, rather than within InterBase. The SYSDBA password remains unchanged. Upon logging into Trams Back Office as SYSDBA after EUA enabling the database, continue using the original SYSDBA password. If that password was never changed from the generic "xxxxxxxxx" password, a prompt launches upon first login to change the password.
All other User Logins have their current password converted to their login name (which is always Upper Case). As each user first logs into Trams Back Office (or ClientBase) they will need to use their newly converted password based on their login name. For example, if the User Login name is MARY, upon first logging into Trams Back Office the user should enter MARY into the Login Name AND enter MARY into the password. Upon successfully entering the User Login and Password the user is then prompted to enter a new password, to ensure security going forward. This new password is then used each time the user logs into Trams Back Office. Because the database is EUA enabled, all users can now update their own User Login passwords by going to Utilities|Setup|User Profile and entering a new password.
A new setting was added to the Utilities menu called User Login Password Settings. When "Enable Password Expiration" is checked, you can set up how often (number of days) a password should expire. If a User Login password expires as a result of this setting, upon login the user will be prompted to enter the current login and password and then enter (and re-enter) a new password. This setting must be turned on by a user with manager authorization.
PASSWORD EXPIRATION
Enter the number of days until password is expired (Example: 30, 60, 90, etc.). If you are also a CBO user, the maximum time allowed for a password to be used before resetting is 90 days. Once password expires, when user tries to login user is directed to a new page and asked to enter the old password and a new password.
PASSWORD STRENGTH
A setting was also added to assign password strength when creating a new password. If a chosen password does not meet the rules, user must change password before allowed to continue.
Options are low, medium or high and are described as follows:
Low Strength - Passwords must contain:
- A minimum of one character
- A maximum of 8 characters
- Cannot be a repeat of last 4 passwords
Medium Strength - Passwords must contain:
- A minimum of 7 characters
- A maximum of 8 characters
- At least one alpha character (a-z, A-Z)
- At least one numeric character (0-9)
- Cannot be a repeat of last 4 passwords
High Strength - Passwords must contain:
- A minimum of 7 characters
- A maximum of 8 characters
- At least one lower case alpha character (a-z)
- At least one upper case alpha character (A-Z)
- At least one numeric character (0-9)
- At least one special character (!,@,#,$,%,^,&,*,_,-,+,= etc.)
- No character may be used more than once, regardless of case
- Cannot be a repeat of last 4 passwords
BLACKLISTED PASSWORDS
For security purposes certain passwords are no longer allowed to be used in the database. The default that came with the program is no longer allowed for use as a password for SYSDBA. After EUA enabling the database, if the SYSDBA password is the default, or if at any point you are changing the SYSDBA password and you try to use the default, you are prompted to select a different password.
For user logins, the user login name and the user password can no longer be the same. After EUA enabling the database, if you try to create a password that matches the user login name, you are prompted to select a different password.
IMPORTANT NOTES ABOUT SYSDBA PASSWORD
It is extremely important that you archive the SYSDBA password to a removable storage drive as a source of password recovery. If the SYSDBA password is forgotten and was not archived, the password cannot be recovered.
To archive, when changing the SYSDBA password enter the new password and check the box Archive Password. Click OK to save and a popup screen is displayed to create a password recovery disk.
The prompt appears, Please insert your password recovery drive/disk and select the appropriate drive letter to archive the password. To refresh the drive list, click the drop down arrow. Then press OK to continue or Cancel to stop the process. Click the arrow and select the drive to save the password to and click OK.
Once the password is on the drive the prompt, Password successfully archived is displayed. Should the need arise to recover the password from the removable device, in the login screen, click the Forgot Password link (which is only visible with the SYSDBA Login), then insert the removable device and navigate the removable device drive. Once logged in, the SYSDBA password should be changed and re-archived.
Creating a New User Profile
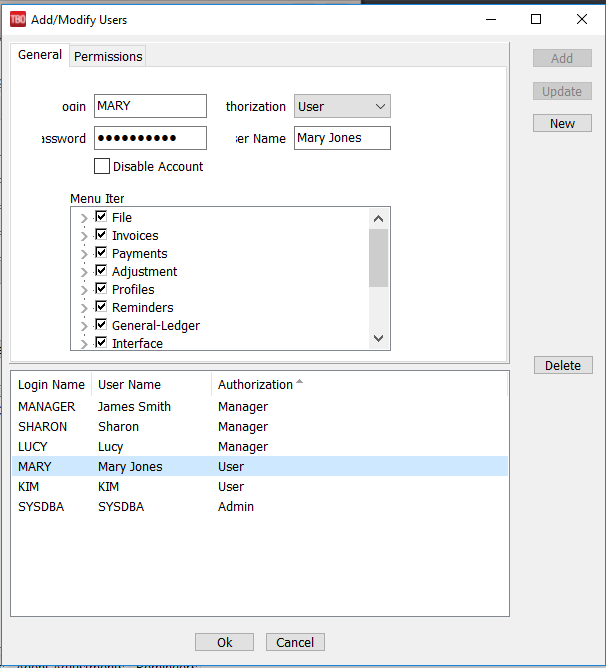
To create a new User Profile, sign in as SYSDBA. Enter into Utilities|Setup|User Profiles and the following screen appears. From here Add, Modify, or Delete User Profiles and Grant or Revoke access to certain areas of the program. Remember to record and store each user's password in a safe location. If a user’s password is misplaced, login as the SYSDBA and setup a new one. But be very CAREFUL with storing the SYSDBA password, as this is a master password.
General Tab
|
Login |
Assign a login code to this User Profile. When signing into the Trams Back Office program, the system prompts for this login code, and access to various areas of Trams Back Office is determined by how the rest of this User Profile is completed. |
|
Authorization |
There are two types of User Profiles. One has an Authorization level of SYSDBA, (Create, modify, or delete other User Profiles. Only one User Profile can be established with an Authorization level of SYSDBA, but several people can be given the same permissions.) The second type of User Profile has an Authorization level of User. There can be an unlimited number of User Profiles with specific authorization levels tailored for access to various areas in Trams Back Office. |
|
Password |
A password can be assigned to each User Profile. When signing into Trams Back Office, the system first prompts for a login code, then the password. (When entering passwords, the screen displays *** for security purposes.) |
|
User Name |
Enter the name or names for whom the User Profile is established (e.g. Lee/Brian). |
|
Disable Account |
To disable a user account rather than delete it, check this box. ClientBase users (who are sharing the Trams Back Office database) can be disabled from using Trams Back Office by checking here. |
|
Menu Items |
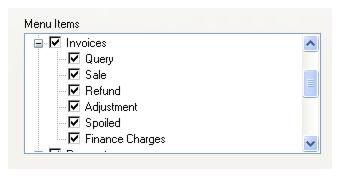
From the menu item "tree," enable/disable any file menu items for user. Use the plus sign to enable/disable these items. (See Graphic Below.) |
|
Add/Update/New |
To add a new user, click New, fill out the required fields and click Add, then OK to save. To revise a user permissions, click on the user name in the data entry screen below, make all changes in fields above, and click Update, then OK to save. Copy an existing user’s settings by clicking on the user to copy in the data entry screen below, change the Login Name, Password and User Name in the fields above, and click Add, then OK to save. |
|
Delete |
To delete a user, highlight the name in the data entry screen below, and click Delete. |
Menu Items
Check all the menu items for this user to access. Drill down into the menu items by clicking on the plus sign to grant more targeted permissions.
Permissions Tab

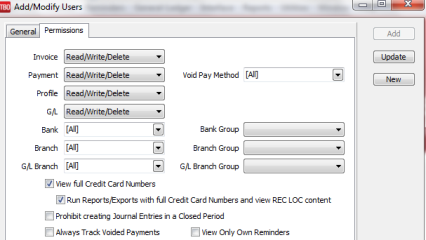
Establish system permissions by clicking on the Permissions Tab. Changing and deleting information is permanent and should only be granted to Trams Back Office users who need this function.
|
Invoice, Payment, Profile, and GL Permissions |
Invoice, Payment, Profile, GL Permissions can be set to Read Only, Read/Write, Read/Write/Delete, None, or Create. Read Only means information can only be viewed but not changed. Read/Write lets the user view, add, and change information. In addition to viewing and changing information, Read/Write/Delete also permits deleting or voiding information. None does not allow the user to access that part of the program. Create permits the user to create new items in the system, but user will not be allowed to edit or delete any items. |
|
Void Pay Method |
From the drop-down, check off which pay method this user has permission to void. |
|
Bank Permissions |
Specify which bank user has access to by selecting All, or checking off appropriate bank number. If users try to view an item associated with a bank for which they do not have permission, they’ll get an error message. |
|
Bank Group Permissions |
Select the group for the user to be a part of to access the same banks as other group users. Go to Utilities|Setup|Groups. Select Bank as the Group Type, and type in a default group label. When adding the entry, a Members area becomes available to pick and choose banks. |
|
Branch Permissions |
Specify which branch user has access to by selecting All, or checking off appropriate branch number (0 is main branch). If users try to view an item associated with a branch for which they do not have permission, they’ll get an error message. |
|
Branch Group Permissions |
Select the group for the user to be a part of to access the same branches as other group users. Go to Utilities|Setup|Groups. Select Branch as the Group Type, and type in a default group label. When adding the entry, a Members area becomes available to pick and choose Branches. |
|
GL Branch Permissions |
Specify which branch user has access to for GL permissions by selecting All, or checking off appropriate branch number (0 is main branch). |
|
GL Branch Group Permissions |
Select the group for the user to be a part of to access the same GL Branches as other group users. Go to Utilities|Setup|Groups. Select GL Branch as the Group Type, and type in a Default Group label. When adding the entry, a Members area becomes available to pick and choose GL Branches. |
|
Enable ability to view full Credit Card Numbers |
Check here for the user to view full cc #s. The credit card numbers are masked upon saving to the database. Users who have this permission enabled can right-click to view the full credit card number and select Show Full Credit Card numbers in the following areas: - on the Payment Screen - credit card number field - in Profiles - Payment Info Tab - in CC Merchant Reconciliation - Expanded Fare booking tab - Comm Track CC No field Users with this permission can also run the CC Merchant report. Users without this permission are unable to right-click to view the full credit card number in the above areas, and cannot access the CC Merchant report. |
|
Enable ability to run Reports/Exports with full Credit Card Numbers and view REC LOC content |
Check here for the user to have ability to run Reports/Exports showing full cc #s. By default, this option is disabled (unchecked) and can only be enabled when the option Enable ability to view full credit card numbers is also enabled. Once this user permission has been enabled, any time a report is run or an export is performed a log event is created. This allows users to run the Prism Handoff and the CC Merchant report. The CC Reconciliation report mail merge format contains masked Credit Card numbers. Users must have permission in this area checked in order to run this report.
The REC LOC text file (copy of the interface record attached to interfaced invoices) is encrypted. The user permission to view full credit card numbers applies to viewing the REC LOC record. If the user does not have permission to view full credit card numbers, when they click on the REC LOC button in the invoice header they will be prompted with Access Denied, User Permission Setting. In addition, the setting will now prevent them from Processing and running the Interface Record List report. |
|
Prohibit creating Journal Entries in a closed period |
If the user permission is enabled and end of period posting is in place, if a user attempts to save a journal entry (either from a payment or from general ledger journal entry), the user will be prompted that an end of period is in effect, permission to save is denied. If attempted from a payment screen, the payment will be saved but the opportunity to create a journal entry will not be allowed. When the user permission setting is disabled, permission to create a journal entry in the closed period will be granted however a prompt is raised to warn the user that they are making an entry in a closed period. |
|
Always track void invoices |
A void pay method is multi-selectable by a drop-down field which lists all of the payment method options. By checking pay methods, the user will not be able to void payments where the pay method is one that is checked in the user's permissions. The default setting is none meaning users have permission to void all pay methods. The void payment option will be dimmed if the requirement to Always Track Payment Voids (under Utilities|Setup|Global Defaults|Prompt tab) is enabled. When the Global Default to track voided payments is not checked, users need to go to each user profile and check the track voids option. Those that do not have track voids enabled will get the prompt to track the void or not. Users that do have the option checked won't get the option, it will always track the void.
|
|
View Only Own Reminders |
Restrict a user from viewing other users’ reminders by checking here. |
PCI REQUIREMENTS
A PCI requirement mandates logging when a full credit card number has been viewed. Therefore, TBO functionality allows users to view a full credit card number provided the user is logged in as SYSDBA or the user profile has the permission to view full credit card numbers enabled. Once enabled, in payments received and made, in the profile payment info tab and in the booking expanded fare tab CC Commtrack field, right-clicking on the credit card number field displays a menu option to view the full credit card number. When the user selects it, the full credit card number is displayed in the payment field and a log event is created including: Date/Time; Username; Credit Card Number; Screen or report they were in when the full cc number was viewed; and payment/invoice/profile number.
Global Defaults
Global Defaults lets the agency personalize certain aspects of the Trams Back Office system.
Auto Updates Tab
The Auto Updates tab under Utilities|Setup|Global Defaults allows more control over which updates are automatically downloaded and installed. The recommended setting is "Always check for updates at log in."
When selected, this option prompts users whenever new Feature Enhancements are available to install. (Feature Enhancements are minor updates that do not require a database change.) Under that option are three sub-options for Beta Testing.
- Received featured enhancements upon public release, No Beta testing (Default setting) - Enhancements will be provided to your users upon public release and not before.
- Allow individual users to opt-in as Beta testers - Allows your users to decide for themselves whether to install Beta updates. They will get an initial prompt to install available beta updates, but they can opt out by checking "Don't show this again" on the prompt.
- Require all users to become Beta testers - Requires that all users to become Beta testers. All users will be prompted to install Beta updates with no opt out opportunity.
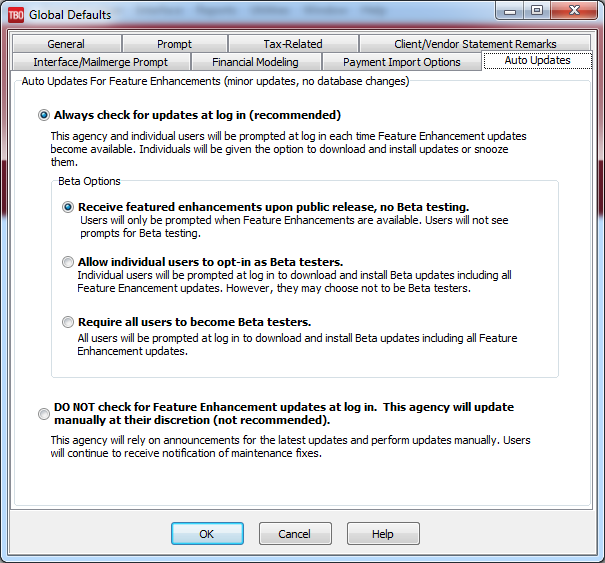
The last option, Do not check for Feature Enhancement updates at login... is not recommended for most customers. It is available for agencies wishing to rely on announcements of new versions and install updates manually.
Note: These options only apply to Feature Enhancements. Maintenance updates containing urgent fixes are not affected by these settings.
Upon login, the auto-update prompt to install updates that appears. It includes a link to the release notes for the update, so users will know what has changed. It also gives users the ability to opt out of Beta updates, if the agency has turned on the setting that allows users to decide whether to participate.
General Tab
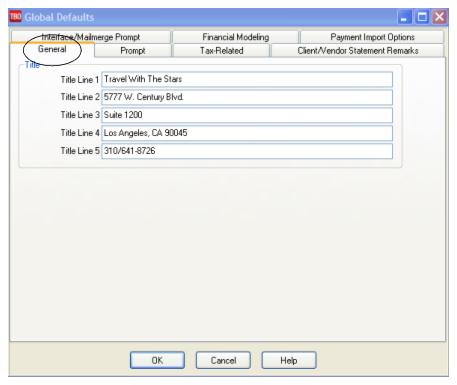
Enter Agency address and phone information. These lines print on reports and on the Trams Back Office main menu.
Prompt Tab
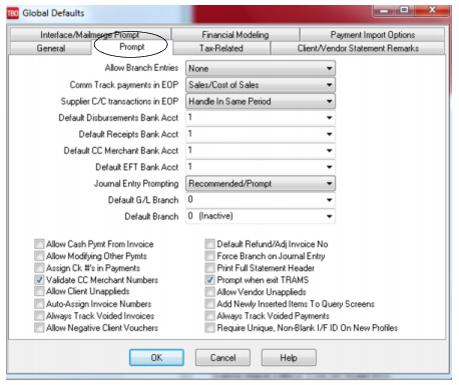
|
Allow Branch Entries |
None: Select None if there are not branch entries in Trams Back Office. STP: Select STP to set branches in the invoice entries only. When the End Of Period is created, no JE’s will have a branch on them. FullSingle Balance Sheet allows branch entries in the Invoices and General Ledger revenue and expense accounts. Reports are available by branch or consolidated. (When creating invoices, there is the ability to select multiple branches, however when the EOP is created only payments and the parts of the invoice that affect the Income Statement (4000, 5000, 6000, 7000, 8000 & 9000 series accounts numbers) will be journalized by branch. The parts that affect the Balance Sheet (1000, 2000 & 3000 series of numbers) will not have a branch in the journal entry.) Full Multiple Balance Sheet allows branch entries in the invoices, General Ledger revenue and expense accounts and assets, liabilities and capital accounts. Reports are available by branch or consolidated. (When creating invoices, there is the ability select multiple branches and every journal entry line where it affects the Income Statement or the Balance Sheet will be journalized by branch.) Note: To activate the Multi Balance Sheet feature, e-mail Trams.AccountingDesk@sabre.com to obtain a password. (See complete directions for setup and use in the Multiple Balance Sheet Setup section below.) |
|
Comm Track Payments in EOP |
Use this setting to determine Commission Track transactions will be accounted for as Sales and Cost of Sales or as Commission Income. The End of Period journal entry is changed accordingly. (See General Ledger chapter.) Trams Back Office has the ability to account for invoices as Sales/Costs of Sales or Commission Income. Some agencies have used Commission Income accounting with previous back office systems and may want to consider converting to Sales/Cost of Sales when converting to Trams Back Office as nothing is lost, but much can be gained. Using Sales/Cost of Sales does allow for more flexibility especially with regards to yield management information, because we can track the sales/cost of sales for Commtrack invoices, based on the actual commission received. The cost of sales is determined by the difference between the total fare and the commission of the invoices that have a vendor payment. Converting from Commission Income to Sales/Cost of Sales accounting takes place at the time of loading beginning balances into Trams Back Office. When using Commission Income method accounts are "rolled up" into a Commission Income account based on the actual commission received and the sales amount is not tracked. |
|
Supplier C/C transactions in EOP |
Allow a Supplier booking closed by Credit Card to act like a Comm Track booking by modifying the End of Period so the sale is deferred until commission is received. To set up this feature: Step 1: Select a start date at the beginning of an accounting period (i.e., 1/1/2011) Step 2: Verify that the accounting period prior to the start date is in balance and that the period is posted (i.e., 12/31/2011 must have the EOP and it must be posted as there MUST be the period posted in General Ledger| Posting. The user cannot re-open this period once it has have changed the way to handle the EOP. Step 3: Backup the database. Step 4: In General Ledger|Accounts, create a GL account named Supplier CC Receivable in the 1000 series of accounts. Step 5: In Utilities|Setup|GL Accts|Others, enter the GL account number that was created in Step 3 for the Supplier CC Receivable field. Step 6: In Utilities|Setup|Global Defaults|Prompt, change the Supplier C/C transaction in EOP field to Defer Sales Until Commission Received. Step 7: In Reports|Report Generator| Print Report, print the Report Generator report, CL_TT_AS.RPT (Client Activity by Travel Type) or S_TT_AD (Sales Activity by Travel Type) with the following selection criteria: Date Range:Issue Date Between: Leave blank And: Enter the date one day prior to the start date Invoice Type:All Submit To:Supplier Travel Type:All Invoice Payment Status Client:Closed Payment Method: C/C Invoice Payment Status Vendor:Open Step 8: In General Ledger|Journal Entry, create a journal entry dated one day prior to the start date. For each Travel Type listed on the report printed in Step 7, debit the appropriate Sales account for the Total Fare amount on the report, credit the appropriate Cost of Sales account for the Net Fare amount on the report, and credit the Supplier CC Receivable account for the Commission amount on the report. |
|
Default Disbursements Bank Account |
Sets the bank account in the Payments Made screen to always go to this account. |
|
Default Receipts Bank Account |
Sets the bank account in the Payments Received screen to always go to this account. |
|
Default CC Merchant Bank Account |
Sets the bank account for the CC Merchant Reconciliation feature. |
|
Default EFT Bank Account (Electronic Funds Transfer) |
Sets the bank account for EFT’s. |
|
Journal Entry Prompting |
Select the level of Journal Entry prompting after payment entries: All: Trams Back Office prompts for a journal entry for all payment entries. None: No journal entry prompt is available after a payment. In this case, the only way to create a journal entry is to go to the General Ledger Menu Option and then select Journal Entry. Recommended Prompt: Trams Back Office prompts to create a journal entry when payments are received or made with a pay method of other or a profile type of other. Recommended/Always: Trams Back Office automatically displays a journal entry screen when payments are received or made with a pay method of Other or use a profile type of Other. This is the default setting. Mandatory:Trams Back Office requires a journal entry before a payment with Pay Method of Other, and Profile Type of Other, can be saved. |
|
Default GL Branch |
Multiple GL Branch agencies can select one of their GL branches as the default GL Branch. An error message is displayed if the default branch is set to an inactive branch. G/L Branch defaults for journal entries: If a specific bank account references a G/L Branch, then that is used; otherwise, if the specified payment branch references a G/L Branch, then that is used. If neither of these apply, the default G/L branch is used. |
|
Default Branch |
Multiple branch agencies can select one of their branches as the default branch. |
|
Interbranch G/L Transfer |
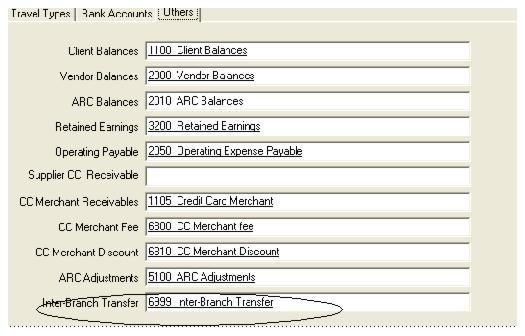
The Inter-Branch Transfer GL Account is only used for those agencies that are using the Multi-Balance Sheet option. This field makes creating journal entries between branches easier. In the past for example, to pay an expense and show the money coming out of one branch to pay for the expense of another branch, the following journal entry needed to be created. Branch Debit Credit 1000 Cash in Bank 0 100.00 6999 Inter-Branch Clear Acct 0 100.00 6999 Inter-Branch Clear Acct 1 100.00 6105 Office Supplies 1 100.00 So this field Inter-Branch Transfer GL Account in Utilities|Setup|G\L Accts\Others was added so that if an Inter-Branch Clearing Account is created (it should be a 6000 series number), and put it in Utilities, it automatically creates the middle part of the above journal entry once OK has been clicked. |
|
Allow Cash Payments from Invoice |
To allow Non-Credit card payments to be entered at the end of an invoice entry, change this setting to Yes by placing a checkmark in the box. |
|
Allow Modifying Other Payments |
When a checkmark is placed in the box, the amount can be modified on payments made to Other profiles - as long as it is not posted or cleared. |
|
Allow Client Unapplieds |
If checked, Trams Back Office allows a payment as an unapplied balance on the Client’s account. If not checked, there is a prompt to create a voucher. Note: Unapplied balances are not advised when the Allow Branch Options/Multiple Balance Sheet is selected. |
|
Auto-Assign Invoice Numbers |
Auto Assign invoice number will "prevent" users from manually overriding the invoice number on a new invoice. |
|
Always Track Voided Invoices |
When this box is checked and upon voiding an invoice, a single prompt window pops up with the Track Voided Invoice box already checked. Confirm the voiding of the invoice by clicking OK. To override the default setting in Utilities, uncheck the box and not track the invoice and its number. |
|
Allow Negative Client Vouchers |
When checked this allows for creation of a Negative Client Voucher that shows on the Client Statement as an amount owed by the client for non-invoice items like NSF Checks, and paying for use of Agency’s company credit card. This allows for tracking a client NSF check until repayment has been made, and for tracking client payments that may be owed for use of the agency’s credit card to pay for an invoice. A Payment Made, Payment Method (Other), Profile Type (Client), would allow a Client Voucher to be created without an invoice. Note: This feature cannot be used if the allow client and vendor applied options are enabled (checked). |
|
Default Refund/Adj Invoice No |
Leave this set to Yes (the box is checked), any Refund or Adjustment invoice uses the same number as the original sales invoice. |
|
Force Branch on Journal Entry |
If this box is checked, a branch number needs to be added on journal entries when using revenue or expense accounts for Full Single Balance Sheet users, and for all GL accounts for Multiple Balance Sheet users. |
|
Assign Check #’s in Payments |
When setting the Assign Check #'s in the Payments field to No by leaving the box empty, there is now the freedom of entering checks without knowing the next valid check number. By checking the box (Yes), TBO automatically assigns the next available check number to each check payment. This is helpful for printing checks from Trams Back Office and want to have the check numbers automatically assigned at the time the checks are printed. |
|
Print Full Statement Header |
With box checked, there will be a Header on all pages of the statement. With the box unchecked, there will be a Header on the first page with no header on remaining pages, and the report information printing at the top of each page. Note: To print statements on pre-printed letterhead paper, remove the Agency Name & Address Information Fields under Utilities|Setup|Headers & Footers and adjust the size of the blank space left to allow for printing on pre-printed letterhead paper. Remember to have the Print Full Statement Header box checked for space to be left on each page for letterhead paper. |
|
Validate CC Merchant Numbers |
When checked, the credit card number on CC Merchant payments will be validated and if an invalid card number or format is used, a warning message will be displayed. When unchecked, no validation will occur for CC Merchant payments. |
|
Prompt When Exit Trams |
With this box checked, receive a prompt when exiting the program, “Are you sure you want to quit Trams?” |
|
Allow Vendor Unapplieds |
If checked, Trams Back Office allows a payment as an unapplied balance on the Vendor’s account. If not checked, there is a prompt to create a voucher. Note: Unapplied balances are not allowed when the Allow Branch Options/Multiple Balance Sheet is selected. |
|
Add Newly Inserted Items to Query Screens |
Check here to immediately display newly created Invoices and Payments on the Query Screens when a new invoice or payment is created from the query screen by selecting "New" Default is set to not display. |
|
Always Track Voided Payments |
By default this is checked and allows users to track any voided payment regardless of payment method (both received and made, whether they directly affect a bank account or not). |
|
Require Unique, Non Blank I/F ID on New Profiles |
If checked, a new profile CANNOT be created if the Interface ID of the profile being created is either blank or is an Interface ID that has already been used in the system. This applies whether the profile is being created through interface, through ClientBase, or manually within TBO. The I/F ID in existing profiles in TBO can be left blank or have a duplicate Interface ID as before. This affects the creation of new profiles. |
Multiple Balance Sheet Setup
Most users have a single Balance Sheet and choose to have a single Income Statement or an Income Statement per branch. Multiple Balance Sheets are available, but are generally only needed if there is a need to print full financials - Balance Sheet and Income Statement - per branch or entity for tax reporting. This is usually only needed if there are branches in separate states, or if for some other reason, separate balance sheets are needed.
Warning! To activate the Multi Balance Sheet feature when switching from a single Balance Sheet to Multiple Balance Sheets, e-mail Trams Support at Trams.AccountingDesk@sabre.com to activate the Multi Balance Sheet feature and obtain a password. They will assist with the following steps:
1. Turn all unapplied balances on both Client and Vendor Balances reports into vouchers.
2. Select Utilities|Setup|Global Defaults and remove the check marks from Allow Client Unapplieds and Allow Vendor Unapplieds.
3.Go through all of the month end procedures. (Create an End of Period, balance the Core Reports against the General Ledger, Post, etc.) Posting must be completed before moving onto Step 4.
4. Select Utilities|Setup|Global Defaults and click the Prompt tab and change Allow Branch Entries to Full Multiple Balance Sheet.
Note: There is a prompt to enter an Access Code” before proceeding. E-mail Trams.AccountingDesk@sabre.com to receive this code and to be informed of the consequences of changing the system to a “Multiple Balance Sheet” setup.
5. Also under Utilities|Setup|Global Defaults, enter a new 6000 series account set up under G/L Accounts|Others called the Inter-Branch Transfer General Ledger account. This automatically creates a debit and credit to properly balance the Journal Entry when clicking OK while making Journal Entries among branches:
Sample Journal Entry |
||||
|
Account |
Description |
Branch |
Debit |
Credit |
|
1000 |
Cash in Back |
0 |
|
100.00 |
|
6999 |
Inter-Branch Transfer |
0 |
100.00 |
|
|
6999 |
Inter-Branch Transfer |
1 |
|
100.00 |
|
6105 |
Office Supplies |
1 |
100.00 |
|
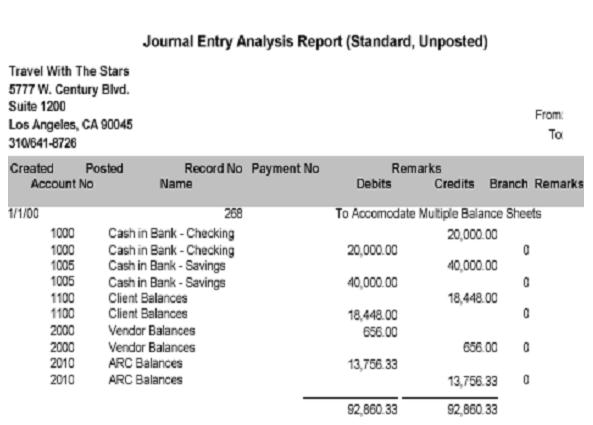
Print a Balance Sheet and create a journal entry splitting the Balance Sheet items into branches. (See example below.)
Tax Related Tab
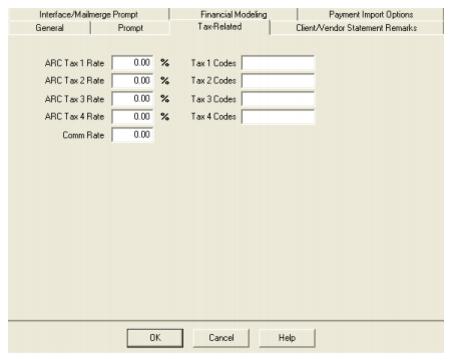
Designate which taxes go to which tax fields when interfacing from the reservations system. For each tax field, specify the two-letter Tax Identifiers of the taxes wanted in this field. If there is more than one Tax ID, separate them by a comma. If there are specified Tax ID’s in any tax fields, taxes not corresponding to the Tax ID’s go to Tax 1. In order for multiple taxes to be separated, be sure to set Allow Multiple Taxes, found in Utilities|Setup|Global Defaults, to Yes.
The commission rate for vendors used in reservations defaults to the vendor commission field in the TBO vendor profile. If the vendor default commission in TBO is blank, then the commission defaults to the amount entered in the field called Comm Rate.

SPECIAL NOTE TO CANADIAN AGENCIES: Please see Canadian tax setup in chapter Setting Up Trams Back Office in the section entitled, Canadian TBO Setup and Special Usage.
Client/Vendor Statement Remarks Tab
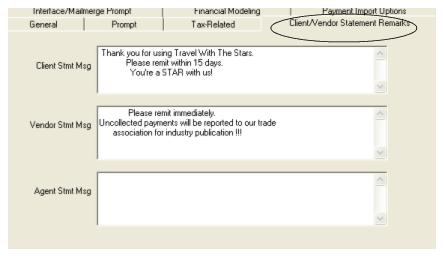
|
Client Stmt Msg |
Enter lines of text to print on all client statements. |
|
Vendor Stmt Msg |
Enter lines of text to print on all vendor statements. |
|
Agent Stmt Msg |
Enter lines of text to print on all agent statements. |
Interface/Mail Merge Prompt Tab
|
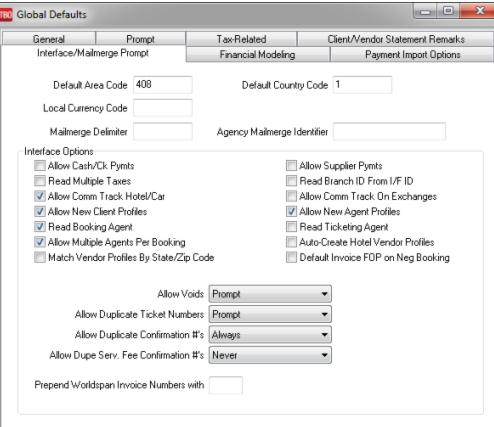
Default Area Code |
Local area code used as a default when entering new phone numbers. |
|
Default Country Code |
Country Code (Defaults to 1 for US and BSP). |
|
Local Currency Code |
Make sure that this code matches the Currency Code in the Bank Account Setup. In order to use the Foreign Currency on invoices, or to use the conversion rates, this must contain the local currency. |
|
Mail Merge Delimiter |
When exporting information from Trams Back Office, enter the delimiter that is compatible with the software receiving the file (i.e., tab, comma etc.). Leaving this field blank defaults to tab. Enter a comma (,) for comma delimited files. |
|
Agency Mail Merge Identifier |
Used to identify the agency number when sending a mail merge file to be consolidated with other agencies' data for direct mail promotions. |
|
Allow Cash/Ck Payments |
Check this box to interface non-credit card payments through interface. Not recommended - consult Trams.GDSDesk@sabre.com before implementing. Check this too if a partial payment is being interfaced. Only one partial payment is allowed per booking. This payment applies to invoices at the invoice level and not the booking level. The entry for the GDS: Cash - *PP100.00*Cash Check - *PP100.00*Check*5432 CC Merchant - *PP100.00*1888602388226584/0504 |
|
Read Multiple Taxes |
By default, Trams Back Office maintains taxes in one lump sum. To track multiple taxes, place a check in this box. If this is checked, go to the Tax-Related tab and enter the tax rates and tax codes. |
|
Allow Comm Track Hotel/Car |
To allow interfacing of comm track bookings for Hotel/Cars, retain this checkmark. |
|
Allow New Client Profiles |
To allow ability to create new client profiles during interface, retain this checkmark. Processing stops so new client profiles can be created. When unchecked, processing does not stop for new client profiles and they are listed on the Processing Error Log to handle as an exception after auto processing. |
|
Read Booking Agent |
If only Read Booking Agent is checked, the PNR booking agent is the agent captured in the Agent Tab of the Booking. This is the default setting and only captures the Booking Agent. If both Booking Agent and Ticketing Agent boxes are checked, then two agents are captured in the Agent Tab. If they are the same agent, that agent is listed twice in the booking. If they are different agents, each agent is captured. The first agent listed is the Booking Agent and second agent is the Ticketing Agent. If no boxes are checked, NO AGENTS are captured. ALWAYS have at least one agent type checked. |
|
Allow Multiple Agents Per Booking |
When checked, multiple agents are interfaced into a booking. When unchecked, only the first agent listed in the interface record is captured. If any agents are assigned to the client's profile, those agents still are added to the booking. Any agents not processed from the record are listed on the Processing Error Log. |
|
Match Vendor Profiles by State/Zip Code |
During Interface Processing, check here to match vendor profiles by State and Zip. |
|
Ignore % For Int’l BSP Air |
Some agencies do not have to pay GST on Intl Air, so this option allows them to exclude GST on their Intl Air invoices during the interface process, without adding additional commands in the PNR. |
|
Allow Supplier Payments |
To allow payments for supplier type transactions to be interfaced, check this box. Recommend: Should Be Checked. |
|
Read Branch ID From I/F ID |
Applies to Sabre agencies converting from ADS or Travelbase. This feature breaks the Interface ID into two fields. The first three characters become the Branch ID and the remaining seven are used as the customer number. To use this feature, the three-character Branch ID must be in the Branch Table. |
|
Allow Comm Track on Exchanges |
To allow interfacing of comm track on exchanges, retain this checkmark. |
|
Allow New Agent Profiles |
To allow creating of new agent profiles during interfacing, retain this checkmark. Processing stops so new agent profiles can be created. When unchecked, processing does not stop, and new agents are listed on the Processing Error Log to handle as exceptions after auto processing. |
|
Read Ticketing Agent |
If the Read Ticketing Agent box is checked, then the PNR Ticketing agent is captured in the Agent Tab of the Booking in place of the Booking Agent. If both boxes are checked, then two agents are captured in the Agent Tab. If they are the same agent, that agent is listed twice in the booking. If they are different agents, each agent is captured. The first agent listed is the Booking Agent and second agent is the Ticketing Agent. If no boxes are checked then NO AGENTS are be captured. ALWAYS have at least one agent type checked. |
|
Auto-Create Hotel Vendor Profiles |
Checking here automatic creation of new hotel vendor profiles during processing. In order for the hotel profile to be auto-created, the Interface ID in the record received, must be more than 2 chars, i.e. Chain Code + Property Code. A 2-char ID does not auto-process. |
|
Default Invoice FOP on Neg Booking |
Check here where there is a discount line and it is desired that the invoice payment apply it to the negative booking. |
|
Allow Voids |
When Always is selected, invoices with voided tickets in them are accepted. There is no other warning other than a message on the Error Processing Log. For simple voids (single ticket, single payment), the system does not prompt for tracking and defaults to Yes to track the voided invoice. When Never is selected, no voids are accepted. When Prompt is selected (recommended setting), invoices with voided tickets in them are accepted, but a warning is given to allow the user to manually intervene and void the tickets. If multiple tickets are issued on an invoice, and one ticket is voided, void is ignored. Functionality has been extended to automatically void an interfaced GDS Void record even if the invoice contains multiple tickets or a service fee, if the client side of the booking to void is open. This would be a void of a booking and not the total invoice. Make sure Allow Voids is set to PROMPT. |
|
Allow Duplicate Ticket Numbers |
There are 3 options for processing Duplicate Ticket Numbers: Always (no prompt), Prompt, and Never. Always processes dupes with no prompts and lists warning messages on Interface Processing Error Log. Prompt gives typical prompt screens with chance to change ticket number. When Never is selected, the invoice containing the duplicate ARC/BSP ticket number booking (all travel types, MCO’s, etc.) would be processed, minus the duplicate ticket number booking. Any ignored duplicate bookings appear on the Processing Error Log to delete manually. To process, the user needs to change the option from Never. |
|
Allow Duplicate Confirmation #’s |
This gives the ability to NOT process duplicate Comm Track Car/Hotel bookings where the Confirmation # is the same for the same vendor. Set to Always to allow duplicate comm track car/hotel bookings; to Prompt for duplicate comm track car/hotel bookings; or to Never allow duplicate comm track car/hotel bookings. When Never is selected, the invoice containing the duplicate Comm Track Car/Hotel booking would be processed, minus the duplicate comm track booking. An ignored duplicate bookings would appear on the Processing Error Log. |
|
Allow Dupe Serv. Fee Confirmation #’s |
This gives the ability to NOT process duplicate service bookings where the Confirmation # is the same for the same vendor. Set to Always to allow duplicate service fee bookings; to Prompt for duplicate service fee bookings; or to Never allow duplicate service bookings. When Never is selected, the invoice containing the duplicate service fee booking would be processed, minus the duplicate service fee booking. An ignored duplicate bookings would appear on the Processing Error Log. |
|
Prepend Worldspan Invoice Numbers with |
Pre-pending the invoice number will assist with a duplicate invoice issue as a result of a Worldspan 5 digit invoice limitation. |
Financial Modeling Tab
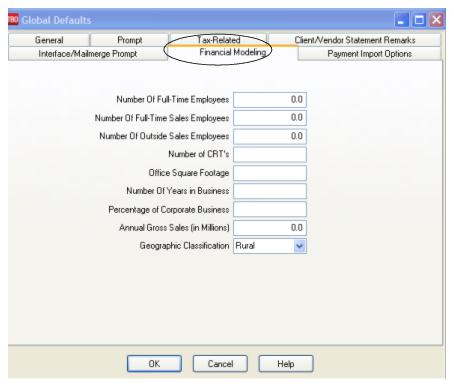
To use the Financial Modeling feature in Trams Back Office, the first step is to set up Agency Information in the Global Defaults. For full instructions on setting up Financial Modeling, please refer to the chapter entitled, Financial Modeling.
|
Number of Full-Time Employees |
Enter the agency’s number of full-time employees. |
|
Number of Full-Time Sales Employees |
Enter the agency’s number of full-time sales employees. |
|
Number of Outside Sales Employees |
Enter the agency’s number of outside sales employees. |
|
Number of CRT’s |
Enter the number of Customer Reservation Terminals in the agency. |
|
Number of Years In Business |
Enter the number of years the agency has been in business. |
|
Percentage of Corporate Business |
Enter the percentage of corporate business the agency performs. |
|
Annual Gross Sales (in Millions) |
Enter the agency’s gross sales (in millions). |
|
Geographic Classification |
From the drop-down menu, select Rural, Urban or Metro for the geographic classification for the agency. |
Payment Import Tab
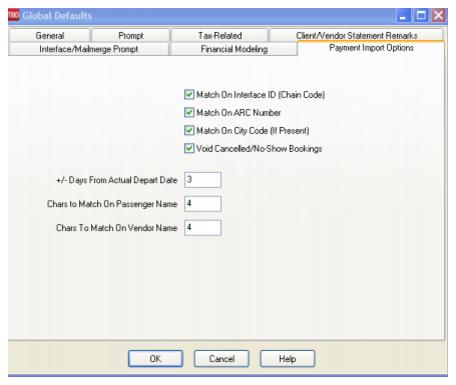
|
Match on Interface ID (Chain Code) |
If Match on Interface ID (Chain Code) box is checked, then the Pegasus Reconciliation using the electronic file only matches if the two letter hotel chain code is present at the start of the Hotel Vendor Profile Interface ID field, matching the two letter chain code in the Pegasus file. When the box is unchecked, then the Interface ID is ignored and matches are made using other criteria. If all hotel profiles have the letter chain code in the Interface ID box, then this box should be checked. |
|
Match on ARC Number |
If this box is checked, the ARC numbers on the invoices in TBO match up with the ARC numbers in the PayMode/Pegasus file. (If the invoice in TBO does not have an ARC number, it still will match if other criteria match.) |
|
Match on City Code (if present) |
If this box is checked, the City Code on the invoices in TBO match with the City Code in the PayMode/Pegasus file. (If the invoice in TBO does not have a City Code, it still will match if other criteria match.) |
|
Void Cancelled/No-Show Bookings |
When this box is checked, any Pegasus or PayMode bookings that are identified as either Cancelled or No Show are voided in TBO with the amounts for Total Fare and Commission remaining as originally entered, even though the reconciliation file shows "0" amounts. Voiding a Comm Track booking in this fashion operates as if the booking was manually voided in Trams Back Office. |
|
+/- Days from Actual Depart Date |
Input the number of days (plus or minus) from the actual depart date on the invoice in TBO for PayMode/Pegasus to match. |
|
Chars to Match on Passenger Name |
Input the number of first characters of Passenger Name on the invoice in TBO for PayMode/Pegasus to match. |
|
Chars to Match on Vendor Name |
Input the number of first characters of Vendor Name on the invoice in TBO for PayMode/Pegasus to match. If Match on Interface ID (Chain Code) box is checked, then the Pegasus Reconciliation using the electronic file only matches if the two letter hotel chain code is present at the start of the Hotel Vendor Profile Interface ID field, matching the two letter chain code in the Pegasus file. When the box is unchecked, then the Interface ID is ignored and matches are made using other criteria. If all the hotel profiles have the letter chain code in the Interface ID box, then this box should be checked. |
Branches
Trams Back Office supports multiple branches. The number of branches available is 1000 (used to be 250).
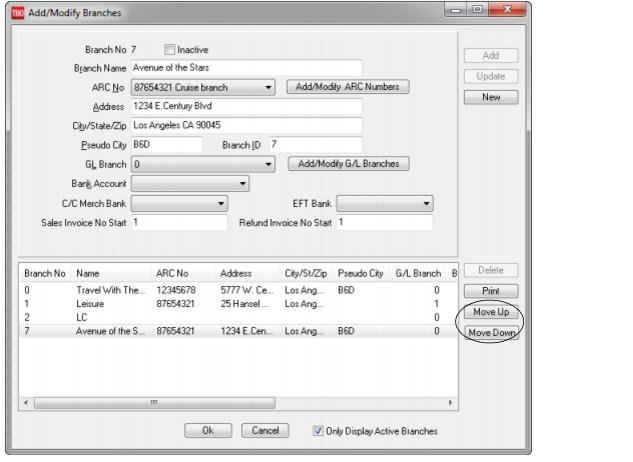
Enter an ARC/BSP number for each branch. (If the agency is not using the branch capability, enter the agency ARC/BSP information in Branch ’0’. Actually Trams regards the main branch as Branch 0, and subsequent branches as Branch 1, 2, etc.) This information prints on the agency's ARC/BSP report. Fill in agency data and select Update, which enters that information in the grid below. Click OK to save and exit the screen.
Agencies using the multiple branch version of Trams Back Office have the option of separating financial activity for each branch, or grouping them together. A branch can represent an STP location, a cost center, or a different department. There can be multiple branches with the same ARC/BSP number, and/or multiple ARC/BSP numbers with the same G/L branch. Each branch uses the same chart of accounts. To make certain Trams Back Office is ready for multiple branches, check the setting in the Utilities|Setup|Global Default section under the Prompt tab.
The Trams license manager tracks the number of active branches. A new branch CANNOT be created if it exceeds the number of branches in the Software License Agreement.

Access the G/L branch field in many different reports. To set up the General Ledger structure for multiple branches, go to Utilities|Setup|Branches, and select ARC/BSP Numbers. Click on the branch, bringing information to the top of the ARC/BSP screen. Type in the full ARC/BSP number, agency name, and agency address, and assign a number to each branch in the G/L Br field. Click Update to save. This allows grouping of multiple branch locations to the same G/L account number for financial reporting purposes.
Branches can now be added and deleted. A branch cannot be deleted if there is a profile, invoice or payment record assigned to it. Branch numbers of deleted branches can be re-used. All newly added branches are added to the end of the list of branches, even if they are reusing a number from a deleted branch that used to be higher up.
The order of branches can be changed using the up and down arrows on the right side of the screen. This sort order is shared by all Trams products.
Information from a copied Branch can be used to update an existing Branch or to create a new Branch.
Branches can only be added, deleted, or re-ordered on the Primary copy of the database.
Note: As branches are being entered after Branch 0, change the default branch field in the Utilities|Setup|Global Defaults Prompt tab for easier data entry. Also, it is possible to make a branch inactive if it is no longer in existence, has activity on it, and is not wanted to appear on the drop-downs. It does appear, however, on the invoice/payment screens since TBO needs to display inactive branches for edit purposes.
The Branch ID field is for those agencies (usually ADS or TravelBase) that currently use the first 3 digits of the Interface ID to separate their branches. If this field is used, insert the first 3 digits for branch identity, and make sure to go to Utilities|Setup|Global Defaults|Interface/Mail Merge Prompt, and check the Read Branch ID from I/F ID area. Every single client must have this branch ID as the first 3 digits of the Interface ID, or this will not work.
Associate branches with a specific bank account or CC Merchant bank account. Based on the Payment Method and Branch selected when doing payments, the correct bank account for that branch and payment type is defaulted based on entries here. Note: When changing the branch number on a payment, TBO defaults to the bank account lined to that branch set up in this area. The bank account should agree with the default bank account for the branch selected.
There are also fields per branch to put in the Sales Invoice No Start and the Refund Invoice No Start for manual entry. Make sure the numbers selected do not conflict with the invoice and refund invoice number series in the GDS. Trams does not permit duplicate invoice numbers.

GST/HST TAX RATE FIELD in BRANCH SET-UP
Larger Canadian agencies have branches in multiple Provinces. GST applies to most agencies with branches all in one province and the current rate is 7%. In 3 provinces (Nova Scotia, New Brunswick & Newfoundland) the GST is called HST and the current rate is 15%. In those provinces agencies are dealing with a 15% HST tax and not the 7% GST. It's an either or situation. The taxes are handled the same through the EOP.
An agency with branches with the same GST/HST rate would set this up under Utilities|Setup|Global Defaults|Tax-Related Prompt, and leave this area blank. But an agency with branches with both GST and HST provinces would leave the rate blank in Utilities|Setup|Global Defaults|Tax-Related Prompt and set the rate either 7% or 15%, branch by branch under Utilities|Setup|Branches.
Travel Types
Travel Types in Trams Back Office are categories to organize bookings by the type of travel that they represent. For example, it is often useful to see a breakdown of the agency business by travel type. The travel types are initially set up as shown below. Modify any of the 50 available travel types to correspond to a needed category.
Note: Trams still recommends that agencies not use travel types and purpose other than true types of travel. Having 50 different travel types is unnecessary and not easily managed. Errors in capturing the correct travel type are considerable amplified.
Remember that travel types correspond to certain General Ledger accounts (Sales, Cost of Sales, Commission). If any of the travel types are changed, be sure to change the corresponding G/L accounts (see below).
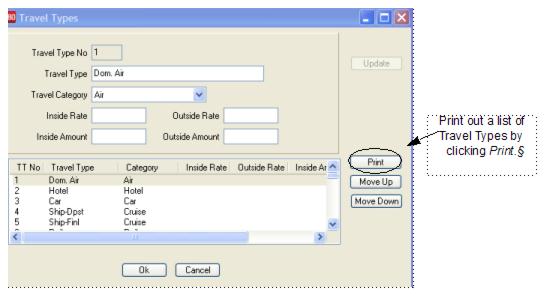
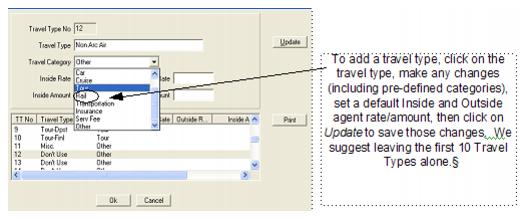
Rearrange the Travel Types order on drop-down menus by using the Move Up and Move Down buttons - the number assigned to travel types does not change therefore, *TT descriptor code entries will not be affected in either manual entries or scripted entries. However, if the agency plans to interface, we recommend NOT changing or renaming DomAir, Hotel, Car, Rail, Int'l. In general, we recommend leaving the first ten Travel Types alone, as changing them would affect interface, although the order in which they appear on drop-downs in TBO can be customized, travel types do not save unless there is a travel type by the name of Intl Air.
Travel types can be edited by going to Utilities|Setup|Travel Types. This screen has 5 columns. The first column contains the travel type number. The second column contains the travel types to use in the invoice booking screen. The third column contains pre-defined categories used to group travel types. Click on the travel type. These categories are viewed by clicking on the arrow, then click on any type, make any changes, and click Update to save those changes. Travel Categories are used to facilitate the Interface from the GDS with uniform travel types. During the Interface, Trams Back Office searches this Travel Category column for a similar match. When it finds a match in the Category column, this record is interfaced to the proper Travel Type.
The fourth and fifth columns contains default Inside and Outside Agent rates or amounts for each travel type. Set up any or all of the Travel Types with a Rate/Amount for Inside Agents, Outside Agents or both. If there is both a Rate and Amount entered for a Travel Type under Utilities, or in the Agent Profile, the Rate takes precedence and both a Rate and an Amount WILL NOT be captured for that Travel Type.
The Agent Rates are applied as follows
1. If an Agent Rate is specified at the booking level of the PNR, then that rate is entered into the Agent Tab of the Booking Screen during the processing of the interface records.
2. If NO rate was specified in the PNR, then any rate by Travel Type specified on the Default Rate Tab of the Agents Profile is used.
3. If NO rate is specified in the Default Rate Tab of the Agents Profile, then the rate specified globally under Utilities/Setup/Travel Types is used.
4. If there are no rates specified in the Default Rate Tab of the Agent Profile or in Utilities Travel Types, then the Inside or Outside Rate specified on the General Tab of the Agent Profile is used.
Note: These default tables, both in Utilities and in the Agent Profile, are only used during Interface Processing. The amount is added for the agent for each booking with that travel type in it. If both a Supplier and Comm Track booking for cruise/tour credit card transactions are being created, both bookings show the same amount. When manually entering bookings in TBO, the system works if Inside and/or Outside Rates are entered on the General Tab of the Agent Profile, then those rates are used for whatever booking is manually being created. To assign a different rate based on Travel Type, change the rate on the Agent Tab of the booking screen.
Adding Travel Types
Bank Accounts
In Trams Back Office, maintain up to 999 bank accounts. Each account is listed within this table. Click New, fill in the new account information, and then click Add to add a new bank account. Highlight an account, change account information, and select Update to Modify an entry, or select Delete to remove a bank account. If a bank account is no longer being used, make it Inactive.
Bank Account Setup
A number between 1 and 999 is assigned to each bank account. We suggest starting with bank account 1. (Bank Account 0 is not accessible.) Click on the bank account number.
|
Inactive |
Once a bank account has activity on it, it cannot be deleted, but can be made inactive if it is no longer being used. By marking it Inactive, this bank account no longer appears in the drop-downs, except on the invoice/payment screens where TBO needs to display inactive bank accounts. |
|
Account Number |
Enter the Account number for this bank. |
|
Routing Number |
Enter the Routing number for this bank. |
|
Description |
Enter an alphanumeric description of the bank account to which this number is being assigned. |
|
Bank & Book Balances |
There are TWO balances - one is the “bank” balance, and the other is the “book” balance. The bank balance reflects items cleared through the bank and is the ending balance of the last completed bank reconciliation. The book balance is the ending balance showing in the check register. |
|
Currency Code |
The 3 letter code of the country the bank account is in. The code is entered only if the bank account is different than the local currency. |
|
Conversion Rate |
The current default rate from the bank is defaulted to 1.0000. If using local currency, do not change this area. If a currency code is different from the local currency above, it can be left as the default, and the rate change when the payment is received, or put the current conversion rate here. |
|
Last Check |
Most recent check number entered. |
|
G/L Branch |
Set this to the appropriate branch the account applies to if it is branch specific. If a specific bank account references a G/L Branch, then that branch is used; otherwise, if the specified payment branch references a G/L Branch, then that branch is used. If neither of these apply, the default G/L branch used is set up in Utilities|Setup|Global Defaults|Prompt tab |
G/L Accounts
The G/L Accounts setup screen is where to set the default General Ledger accounts for the automated End of Period Journal Entry. This screen is broken down into three screens: Travel Type; Bank Account; and Others. Each account specified in this table must be a valid G/L account. To add a new GL account, first add the GL account number in General Ledger|Accounts (the Chart of Accounts). If there is not an account number to point to, set-up what is known as an “error account” (suspense) in the Chart of Accounts, such as 6666 Error Account. Next, point any account that does not have an Chart of Account number set up for it to this 6666 Error Account number. If an amount accidently “falls” into one of these areas that does not have an account number, there is a way of retrieving the figures by printing out activity in the 6666 Account and putting transactions contained therein into the correct account.
The Travel Type table lists Sales, Cost of Sales; Commission; and Overrides. Click and highlight the desired field. When typing, an arrow appears, indicating more information. By clicking the arrow, a pull-down menu of accounts appears. Select one and click to update.
G/L Account Setup/Travel Type
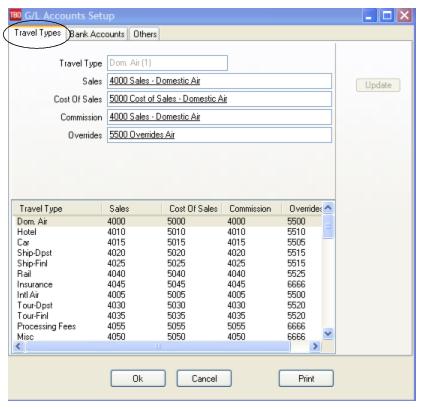
IMPORTANT Note to Financial Modeling Users: If the Comm Track payments in EOP in Global Defaults is set to Comm Track, and a Financial Modeling report that matches the Income Statement is run, it is important to point the Commission Income Accounts to a unique Chart of Accounts Number. For example:
Correct: Domestic Air Sales - 4000
Cost of Sales - 5000
Commission Income - 4100
Override - 5500
Incorrect: Domestic Air Sales - 4000
Cost of Sales - 5000
Commission Income - 4000
Override - 5000
For full instructions on setting up the Financial Modeling feature in Trams Back Office, please refer to the chapter entitled, Financial Modeling.
G/L Accounts Setup/Bank Accounts
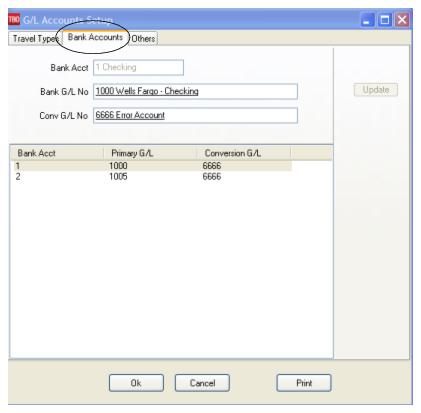
The Bank Accounts tab assigns General Ledger accounts to the bank accounts. Divert all unused accounts to the 6666 (error) account. If any activity is showing in this GL account, it is a flag, indicating a need to investigate entries more carefully.
Other Accounts tab provides a mapping mechanism for Trams Back Office automatic End of Period. It consists of Client Balances, Vendor Balances, ARC/BSP Balances, Retained Earnings, Operating Payables, CC Merchant, Receivables, and ARC Adjustments. The Retained Earnings is used only in the automated Year-End routine. This table is set up initially to correspond to the default General Ledger in Trams Back Office. If changes are made to the General Ledger, be sure to make corresponding changes in this table. Click on any of the other accounts, type a few of the numbers (or letters) to see that arrow. Click on a valid GL account for a pull-down menu.
Also in this area are G/L defaults for CC Merchant Fee and CC Merchant Discount for those users who are using the CC Merchant feature. Divert all unused accounts to the 6666 (error) account. If any activity is showing in this GL account, it is a flag, indicating a need to investigate entries more carefully. Click OK to save.
Other Accounts Setup
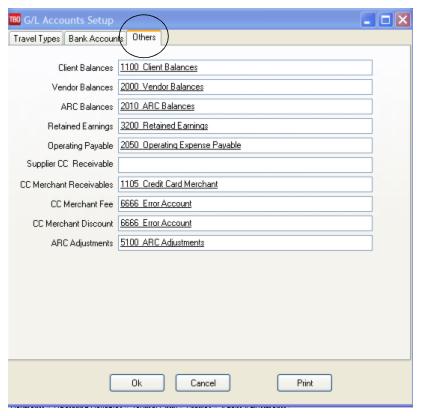
Make any modifications. When finished, click OK to save. If one of the Account Numbers specified doesn’t refer to an existing General Ledger account, the system prompts with an error, “No matching GL Account found.” To acknowledge, click OK, and the system positions the cursor to the Account that is in error. Inspect the G/L setup screen and make sure the accounts are properly assigned.
Note to Canadian Users

TBO Canadian users have these additional fields:
GST Payable Field: Used to track amounts for GST on Commissions
GST Receivable Field: Used to track amounts for GST on Expenses.
The difference between the amounts of the two accounts is the net amount that would be owed to or be due back from the government for GST taxes. When either of these identified accounts, along with the GST Rate, are selected for use in an Other or Agent profile, the calculation correctly computes the GST based on the Total Amount of the Payment utilizing the profile.
Checks
Setup Checks before using the check writer to specify the print format. The check printer is designed for any standard continuous form check stock, or single check laser printer. The check writer enables the agency to print lengthy fields inside a square box area by defining their height, width, and placement on the page. The option to set the field's measurements are found in the main Utilities|Setup|Checks. The first dialog box is the Check Writer List to list of the agency’s different checks’ general defaults. Different check settings for different types of checks (payroll, expense, etc.) can be created. Click Add to add a new check and its settings; Modify to edit a check’s settings (there is one default setting); and Delete to remove a check, and its settings. Get a ruler and several copies of the computer check. Use the copies to check the settings once setup is complete. That way avoid wasting good checks when doing a test printing.
- Highlight the Check Writer Default Setting and select Modify.
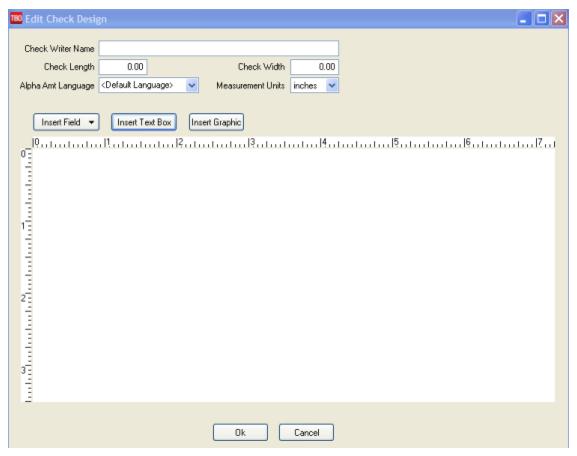
2. Next measure (all measurements are in inches) the length of one check from the top of the check (including the vouchers) to the bottom. If this measurement is 11 inches, enter the number 11 in the Check Length field. Measure the width of the check. If this measurement is 8 and 1/2 inches, enter 8.5 in the check width field. Important: Specify in Trams Back Office the size of the check. If there are no values in width and height, checks do not print.
3. Click Insert Field to select the first field to be used on the check. Notice each field is numbered. Measure where on the check in inches this field to print, and use the four-directional arrow and the ruler to pull the field on the screen where this field is to be located. Use the two-directional arrow to size the field either vertically or horizonally. Also input dimensions, choose a font, justification, and do other formatting by double-clicking on the text box, or right-mouse clicking on the text box and selecting Properties.
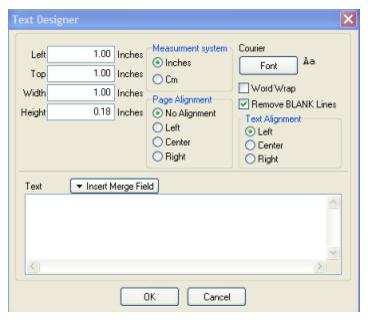
Only set up the fields wanted to printed on the check. Add or modify this area at any time.
Attention Canadian Users: 3 Additional Merge Fields

To accommodate the new banking check requirements that went into effect in Canada on 31 Dec, 2006. There are three merge fields:
Date Year (YYYY)
Date Month (MM)
Date Day (DD)
To add the Canadian required YYYY, MM, or DD under the appropriate component of the date fields, add a text box with the appropriate identifier under each date field.
4. Any field to print on the check more than once, requires more than one setting. For example, if this is a a two-voucher check and the date is required to print on the check and the two vouchers, there will be three date settings, each with a different measurement from the top.
Example: Let’s assume this is a two-voucher check. The check information is printed on the first voucher. Since some of the same fields are to be printed on the voucher, create duplicate fields and position them on the voucher where they are to print. The confirmation number and remarks are to be printed on the second voucher. In the check set-up, select Insert Field, and click Confirmation Number. Measure down from the top of the check where the information is to be printed. Enter that number in the Properties area of the field; or simply drag and drop the field where it is to be printed. Measure from the left of the check, and enter that number in the Left field on the Properties screen. Continue with the Width and Height measurements. To add remarks, click on Insert Field and select Remarks. (That field may have to be re-sized quite a bit to get that to print on the check.)
Another Example: There is a three-part voucher check and all the information from Voucher 1 and Voucher 2 needs to be printed on Voucher 3 (the one to keep for office records). Create duplicate entries of each field, changing the length from the Top by dragging and dropping the field or by using the Properties area. The following are sample setting for a three-part voucher check.
|
Check Example |
||||
|
Item Description |
Left |
Top |
Width |
Height |
|
Alpha Amt |
.78 |
1.25 |
5.62 |
.18 |
|
Amount |
7.25 |
1.87 |
1.12 |
.18 |
|
Amount |
7.25 |
7.50 |
1.12 |
.18 |
|
Amount |
7.25 |
4.25 |
1.12 |
.18 |
|
Check # |
5.0 |
7.25 |
.50 |
.18 |
|
Date |
5.75 |
1.87 |
.84 |
.18 |
|
Date |
5.75 |
4.25 |
.84 |
.18 |
|
Date |
5.75 |
7.50 |
.84 |
.18 |
|
Payee Name & Address |
1.10 |
2.0 |
4.69 |
2.00 |
|
Payee Name & Address |
1.10 |
7.50 |
4.69 |
2.00 |
|
Remarks |
1.25 |
5.75 |
7.00 |
1.00 |
|
Remarks |
1.25 |
7.50 |
7.00 |
1.00 |
|
Journal Entry |
1.25 |
8.50 |
7.00 |
2.00 |
5. Continue for each field desired to print on the check. Click OK to save.
To delete a field, highlight that field and click Delete. To print checks, go to Reports|Payments|Check Writer. Complete the fields for the check numbers to print. To view the checks before printing, select View Checks. Also print a single check from the Payment Query screen.
Troubleshooting in Check Writer
Questions to ask if there are difficulties printing checks.
- Did I indicate the correct size of my checks?
- Is the height set high enough to accommodate the printer font? The default is .18. If the settings all look correct but nothing is printing on the checks, try resizing this text box or setting the height of the settings at .25 in the Properties.
- Are the settings overlapping?
- Do I have the setting printing off the check -- too far to the right or off the bottom? (i.e.: the check width is 8.0 and it is set to begin printing at 8.5).
- If the last part of the entry doesn’t appear, resize the text box. It may not be set high enough to accommodate the extra lines. Example: Only the first two lines of the Payee Name and Address appear.
- A payroll JE requires several lines. If the settings appear correct but the JE is not printing, check the height of the setting. It may not be set high enough to accommodate the multiple entries.
Conversion Rates
Trams Back Office can convert foreign currency transactions to your agency's local currency.
1. Enter your agency's' 3 character local currency code under Utilities|Setup|Global Defaults|Interface Mailmerge Prompt tab
2. Manually load conversion codes and rates under Utilities|Setup|Conversion Rates. Since currency rates fluctuate, the rates should be updated periodically.
a. Fill in the conversion rate for each currency and click Add to see it in the data entry box below. A warning message of Duplicate Currency Code is displayed when trying to add a duplicate conversion rate.
b. To edit a currency rate, select the entry and click Update.
c. To delete and entry, highlight it and click Delete. Click OK to save all.
If a hotel or car transaction is interfaced and no local currency equivalent has been loaded by a hotel vendor, (hence the hotel’s currency is not shipped in the interface file) during the Interface/Download routine, a look up on the conversion rate table will take place. If the currency code and rate are found in the conversion rate table, the foreign currency amount is converted to your agency's local currency in the booking record. The foreign currency tab in the booking displays the hotel currency code and rate used for the conversion process.
Printer Defaults
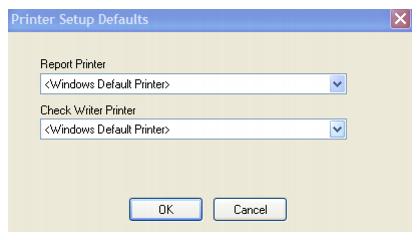
From the pull-down menu, select the printer wanted to use for Reports and the Check Writer if this setting differs from the printer default settings in Windows. The printer could be the same or different for each setting.
Report, Statement & Invoice Headers/Footers
To add customized headers and/or footers to Trams Back Office Reports, Statements, or Invoices, go to Utilities|Setup|Headers/Footers.
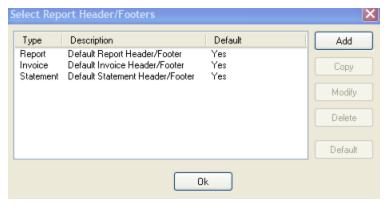
There are default Header/Footers set up for both Reports, Invoices, and Statements, but these defaults cannot be modified or deleted. To modify an existing default, click Copy, and then highlight the entry and click Modify to change the setting. To add a brand new header/footer, click Add. Specify from the drop-down menu whether the new entry is a Report, Statement or Invoice Header/Footer. Add a Description, Insert Text or Insert Graphic per directions outlined below in Modifying a Default Header/Footer section below. To delete a non-default header/footer, highlight the entry and click Delete. To set a header/footer as the default, highlight the entry and click Default.
Note: To print statements on pre-printed letterhead paper, remove the Agency Name & Address Information Fields, and adjust the size of the blank space left to allow for printing on pre-printed letterhead paper. Remember to have the Print Full Statement Header box checked under Utilities|Setup|Global Defaults|Prompt Tab for space to be left on each page for letterhead paper.
Modifying a Header/Footer
To modify headers or footers:
- To modify a header/footer, go to Utilities|Setup|Headers/Footers, highlight the default entry to modify, and click Copy (since the defaults cannot be deleted), or click on Add to add a brand new entry).
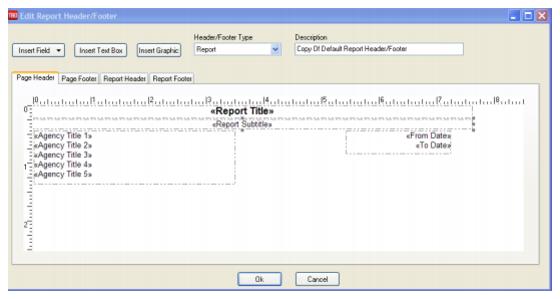
2) Choose the Header/Footer type - Report, Invoice, or Statement.
3) Add a description line which acts as a "title" to identify different headers/footers.
4) Click the Page Header/Page Footer/Report Header/or Report Footer Tab. Click the desired tab to setup the headers and footers. The report header and the report footer print ONLY on the first or last page. This report footer can be used as an agency’s “Terms & Conditions” when running an invoice, since it’s on a separate page when running an invoice. The page header prints on each page of the report, and the page footer prints on each page of the report, except on the Report Footer page.
5) Use Add Text to insert text into the header or footer. A text box appears in the upper left corner. To type and format text, double-click the text box. A screen appears to enter the desired text, align the text, and set the font. Click OK to go back to the main screen. Highlight the text box to click and drag the text box and position it. Click and drag the text box to size it properly. Movement and sizing can be done by either double-clicking on the text boxes, or right mouse clicking on the text boxes and clicking Properties. Choose Font, Page Alignment, Text Alignment, Insert Merge Fields or text, and more from this dialog box. Click OK to save.
Moving can also be done by clicking on text or graphic boxes and moving them into any location by using the 4-directional arrow. Size the default text boxes by using the 2-directional arrow.
6) Use Insert Graphic to add a graphic file. Use the browse feature to locate the graphic file on any drive/directory and click Open once located. (Use *.jpg, *.jpeg, *.bmp, *.ico, and *.emf type graphic files within headers and footers.) Double-click the graphic to access dialog box to set size and page alignment, or highlight the graphic to click and drag, size, and position it properly. Double-click on graphic box, or right mouse click on the box, and click Properties.
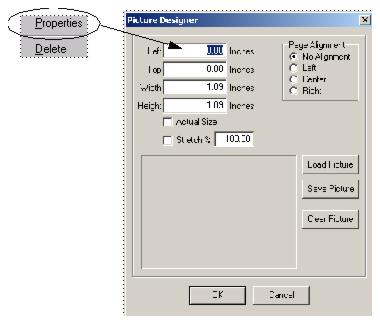
7) Click OK to save.
8) Print out a sample report and adjust settings accordingly.
Fare Codes
For generating Fare Saving Reports in Trams Back Office, this table represents fare codes and information and is user definable. An unlimited number of two-character alphanumeric codes and their descriptions can be entered. A warning message of Duplicate Fare Code will be displayed when trying to add a duplicate Fare Code. These codes are identified within the invoice booking on the Expanded Fare Information screen and are usually populated via interface. See the Interface Preparation Guide for the appropriate PNR entries.
A justification code allows the agency to communicate to clients the reasons they did not get the lowest fare. Justification Codes are set up in Utilities|Setup|Fare Codes.
Hint: Print out a Fare Codes setup sheet for the agents by clicking on the Print button.
City Codes
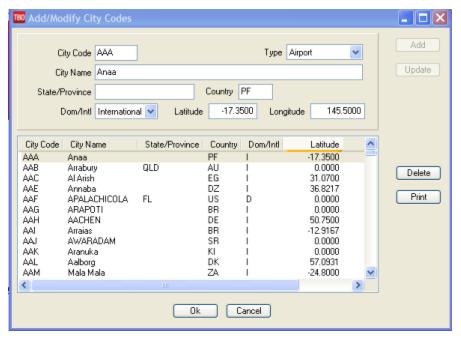
Trams Back Office stores about 5000 city codes and their corresponding full city name. Modify, add, and delete from this list by going to Utilities|Setup|City Codes. For the most part, there is no need to come into this area. Trans-border agencies may want to add some cities, but with caution. Highlight the city code, make any changes, click on Update or Delete, or enter any new information by clicking Add. A warning message of Duplicate City Code will be displayed when trying to enter a duplicate city code.
|
You are printing an invoice for Tom Smith and notice the city name for ORD is printing as Chicago. You want to change it to Chicago O'Hare. To edit this city code, go to Utilities|Setup|City Codes. Scroll to the entry for Chicago and highlight the entry. Make desired modifications and click Update. Click OK to save your changes. Now when you print another invoice for Tom Smith, the full city and airport name prints for ORD. |
Note: The City Code Table only applies to city codes captured on the Segments tab of a booking and does not apply to the Itinerary fields on the General tab.
Groups
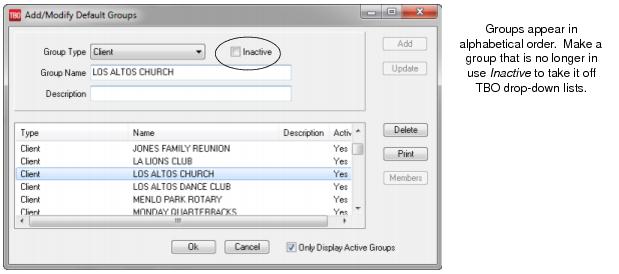
Group identifiers are used to link information together (such as profiles or invoices) for specific reporting purposes. They are used for printing labels, statements for a group, or corporate departments.
1. Select Utilities|Setup|Groups.
2. Click the arrow next to the Group Type field.
3. Choose the type. If choosing Branch, G/L Branch, Bank, or G/L Accounts see step 7 below. Selections are as follows:
− Agent – To link agent profiles together
− Client – To link client profiles together
− Other – To link other profiles together
− Vendor – To link vendor profiles together
− Invoice – To link invoices together
− Payment – To link payments together
− Invoice/Payment To link both invoices and payments together, especially for a group.
− Branch - To link branches together
− G/L Branch - To link G/L Branches together
− Bank -To link Bank Accounts together
− G/L Accounts - To link General Ledger accounts together.
4. In the Default Group field, type in the name of the group. (i.e. Ski Group’04).
5. Add a detailed free-flow description if desired.
6. Click the Add button.
7. Repeat steps 3 and 4 to create each group identifier.
8. Once all group identifiers have been added, click OK to save.
9. When creating the Bank, Branch, G/L Branch, or G/L Accounts groups, access a Members
button that allows specific Bank Accounts, Branches, G/L Branches, and G/L Accounts to be created. Simply move the items to be part of the group from the left side to the right side to include them in the Group.
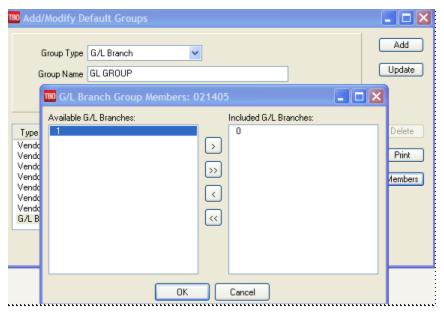
Note: When entering a Group on a Create New Invoice or Payment Screen, a Group Button when click displays descriptions of groups and permits adding a new group name/description from that same area.
IC/Host Codes
Agencies today are choosing to change the way they make their bookings. Many are dropping out of ARC/BSP and booking air tickets through a Host Agency. They may also book some or all of their cruise and tour business with a Host Agency, or continue doing those bookings as they always have. These Independent Contractors (IC) agents working through a Host Agency, may still operate a store front location, or move into a home-based environment.
Independent Contractors need a method to tag and transmit invoices to the Host Agency who have Trams Back Office, and Host Agencies need a method to tag and transmit invoices to ICs who have TBO. Both ICs and Host Agencies need a way to receive and differentiate invoices created from various ICs/Hosts from their own. So the first step for both the ICs and the Host Agency is to setup IC/Host Codes to "turn on" the Host or IC functions in TBO and ClientBase.
For complete instructions on how to do this setup, use the IC/Host functionality, as well as download an Export Utility click here.
CC Processors
This is a setup area for those users who have signed up for the CC Merchant utility. The automated credit card processing feature is designed to process credit card merchant payments, using the data already entered into Trams Back Office. We have formed partnerships with credit card processing companies to bring competitive rates and an easy-to-use interface to process credit card payments. Currently, we have partnerships with NTC (National Transaction Corporation), Ticketmaster (although they are not taking any new customers), and Caledon.
Some preparation is required to begin automated credit card processing. The agency is required to apply to a processing company and allow them to process the credit card payments and deposit money into the bank account.
1) NTC: To obtain an application form for National Transaction Corp. (NTC) please contact Mark Fravel, mark@nationaltransaction.com, 888.996-2273. Once the sign-up process is complete, a Bank ID and Terminal ID is issued. Use the Bank ID as the username and the Terminal ID as the password.
3) BluePay Canada (formerly Caldeon): To sign up with BluePay Canada or for answers to specific questions, contact Support at support@bluepay.caor call 855-812-5191.
Getting Started - Preparing to Process Credit Cards
Automated credit card processing uses the Trams Back Office CC Merchant form of payment. This form of payment is designed to distinguish credit card payments processed by the vendor from those that are processed by the agency. When running a query for processing, only those records with CC Merchant as the form of payment appear in the query.
The agency front office can enter CC Merchant payments either through ClientBase or interface them through the GDS, using the formats outlined in the Trams Back Office Interface Guide for the agency’s particular reservation system. The formats consist of one or two "accounting" lines that are entered in addition to any descriptive entries in the Passenger Name Record. The accounting entry correctly identifies (but is not limited to) the following data: Booking Amount, Commission, CC Merchant Form of Payment, Credit Card Number and Expiration Date, Vendor, and Travel Type. For more information, please refer to the Trams Interface Guide for the GDS system. Be prepared to interface and test formats prior to the implementation of automated credit card merchant processing.
Configuring the Software
The credit card merchant processing feature is designed to query and process CC Merchant payments and reconcile the results of processing back to the Trams accounting data. Some setup is required before processing.
Step 1: Since the agency is receiving deposits for merchant transactions, create a profile in Trams Back Office for the processing company. This is done prior to setting up the CC merchant processing defaults. Select Profiles|Other and create the profile.
Step 2: Some agencies have a specific bank account that is dedicated only to CC Merchant payments. If setting up a new bank account for this, add the bank account before setting up the CC Merchant processing defaults. To add a bank account, select Utilities|Setup|Bank Accounts. In the Description field, identify the bank account as the CC Merchant account and click Add. If funds from the CC Merchant processing are handled through a standard operating account, proceed to Step 3.
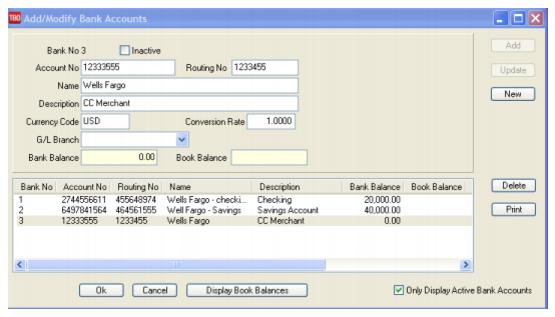
Step 3: Select Utilities|Setup|Global Defaults and click the Prompt tab. In the Default CC Merchant Bank Acct field, type in the bank account number that for the CC Merchant payments to default. If processing CC Merchant payments against multiple bank accounts, enter the account that is used most frequently. Next, in the same Prompt tab, verify that the field Allow Client Unapplieds is not checked. CC Merchant payments that are unapplied balances will not process. Therefore, it is best to turn off this option.
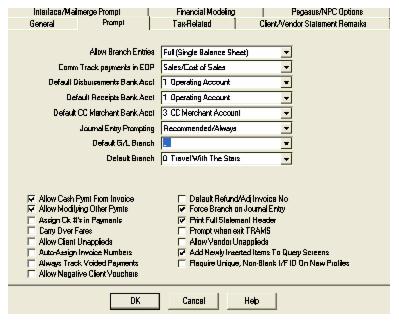
Step 4: Select Utilities|Setup|GL Accts and click the Others tab. Enter the GL account numbers for CC Merchant Receivables, CC Merchant Fees and CC Merchant Discount.
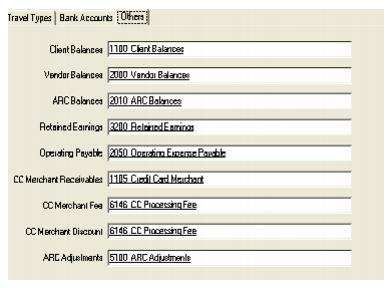
CC Merchant Receivables: When a CC Merchant payment is entered against a client's account, the client balance is closed and is offset against the CC Merchant Receivables account, where the balance remains until the credit card is processed. This account number should be in the asset series (1000 - 1999) of GL account numbers.
CC Merchant Fees: Some processing companies charge a fee for each transaction processed. If the processing company charges a fee per transaction, in the CC Merchant Fees field, type in the GL account number assigned in Trams Back Office for the transaction fees. This number should be in the expense series (6000 - 9999) of GL account numbers. If the processor does not charge a per transaction fee, enter the same GL account number in the CC Merchant Fees field as entered in the CC Merchant Discount field.
CC Merchant Discount: This is the GL account number assigned in Trams Back Office, where the credit card processing fees from the credit card companies are journalized. This number should be in the expense series (6000 - 9999) of GL account numbers.
Step 5: Select Utilities|Setup|CC Processors and setup defaults for CC Merchant Processing.
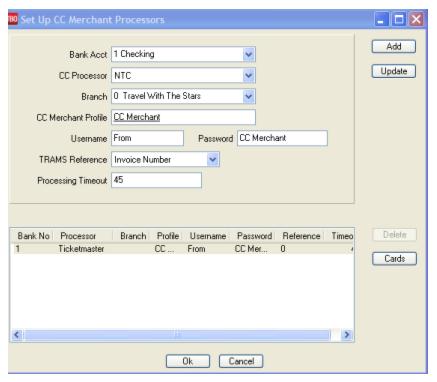
|
Bank Account |
Enter the Bank Account number (i.e. 1, 2, 3, etc.) that CC Merchant payments are entered against. |
|
CC Processor |
From the drop-down menu, select the vendor name of the credit card processor, (NTC - National Transactions Corporation, etc.) |
|
Branch |
From the drop-down menu, select the branch to set up for processing |
|
CC Merchant Profile |
Select the Other profile that was created for the credit card processing company. |
|
User Name |
Enter the Bank ID provided by the credit card processing vendor. |
|
User Password |
Enter the Terminal ID (TID) provided by the credit card processing vendor. |
|
Trams Reference |
Click the drop-down arrow and choose what reference number appears on the client's credit card statement. Choose Invoice Number if the agency would like the invoice number to appear on the client's statement. Choose Payment Number for the Trams assigned payment number to appear on the client's statement. |
|
Processing Timeout |
Enter the number of seconds for the program to wait to receive a response from the credit card processing vendor as to whether the record was processed or not, before the program moves on to the next record. The Trams recommended setting is 45 seconds. |
Click Add to add the Processor's information and then click Cards on the right to set up the credit card types that are being processed. Default settings are required for each type of card being processed.
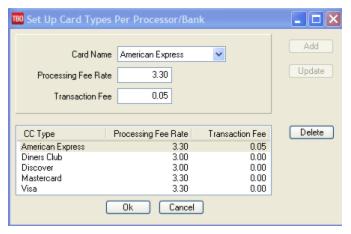
|
Card Name |
Click the arrow next to the field and choose the name of the credit card being set up; i.e., American Express. |
|
Processing Fee Rate |
Enter the discount rate for the credit card chosen, as specified by the merchant contract with the credit card processing company. |
|
Transaction Fee |
Enter the amount of the transaction fee that the processing company charges. |
Click Add to add the card to the setup. Repeat the steps for each type of credit card that are being processed. (Visa, MasterCard, Discover, etc.)
Step 6: Click the OK button to save credit card information. Click OK again to save the setup screen.
Note: If the agency has multiple branches, repeat step 5 for each branch, as the credit card processing company provides a username and password per branch.
For directions on Processing CC Merchant Transactions, go to the chapter, Payments, CC Merchant Reconciliation. For more information on signing up to use CC Merchant, go to www.Trams.com|Products/Services.
UDIDs
This is a setup area for those users who choose to change the UDID 1-999 drop-down items to more meaningful and descriptive terms. For example, a UDID #5 can be changed to Purchase Order Number. The UDID drop-down field then displays the changed new description of Purchase OrderNumber instead of the previous UDID #5. Go to Utilities|Setup|UDIDs. Highlight the UDID to edit. Type its new name in the Description and Update. To print a report of UDIDs and descriptions, click Print. Click OK to save.
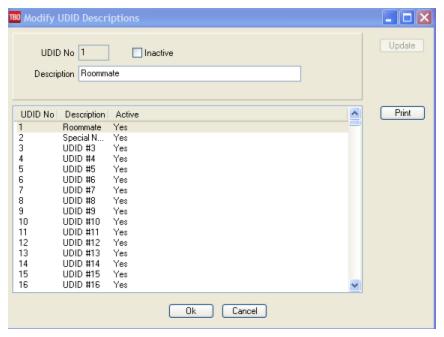
This UDID Description can be used when printing invoices when user selects UDID's to be printed on the invoice. For example, if the UDID #1 description is Purchase Order No. and 9587465 has been entered in the UDID #1 field, it’ll print on the invoice like this:
Purchase Order No. 9587465
(This UDID Description is also available when printing out client and vendor statements when selecting UDIDs to be printed on the statement.)
User-Defined Fields
User-Defined Fields is where to set up Reminder Subjects and Reminder Types to populate the drop-down lists when creating new and querying existing reminders.
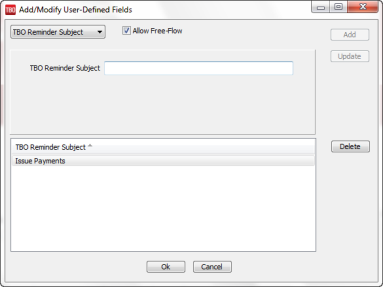
Go to Utilities|Setup|User-Defined Fields to start the setup. By default the Allow Free-Flow box is checked. This allows the user to free-flow text in either the Reminder Type or Reminder Subject fields when creating or querying reminders. If un-checked users, will only be allowed to select from the drop-down list.
To create a new Reminder Type or Reminder Subject, select Type or Subject from the drop-down list and enter a value. Click Add. To change a value, click the desired entry below, change the value, and click Update. To delete a value, click the desired entry below, and click Delete.
Sample Reminder Subjects could be Agent Follow-up, Check for Payment, Run Reports, etc. Sample Reminder Types could be Phone Call, Appointment, Email, etc.
Alarms
Customize Reminder Alarm settings by going to Utilities|Setup|Alarms. Check or uncheck Default new reminders with Alarms turned on; and Check for alarms every minutes.
Backup Overview
Why do Backup?
Because some day the computer housing the Trams database WILL crash. Backup is the ONLY insurance!
IMPORTANT Note: The TBO Backup Utility does not backup Reports. Also it does notbackup the Spool Directory/s. These must be backed up separately on a consistent basis. For information on how to backup Reports/Spool Directory/s, see section below, Backing Up Reports/Spool Directory/s.
Preparing for Backup - Tips
Use the Trams Backup Utility. Use the Trams Backup Utility (Ibbackup.exe) to create a Trams.gbk.zip file. This file would be used to restore the database should the need arise. Backing up just the database file (.gdb or .IB) would not provide the ability to restore a database, as it is not a restorable file. Restoring a.gbk.zip backup file also re-indexes the database files.
Backup must be done regularly. Backup every day, prior to adding more data to the system,. Formatting two sets of backup media (Flash drive, i.e.), and labeling them "A" and "B" is recommended. Rotate the media, using one, then the other. Suggestion to take an extra backup once a week and take it off-site. To start the backup utility, go to Start|Programs|Trams Back Office|Database Backup.
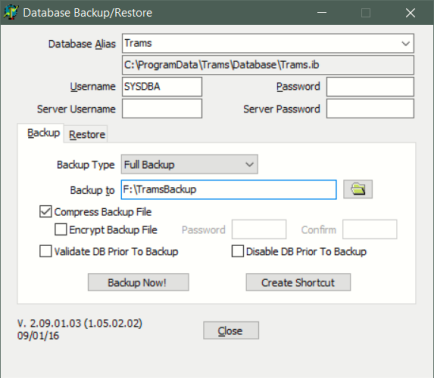
Database Alias: Database Alias from the drop-down. This is the database which will be backed up.
Database Path: By default below the Database Alias is the path where the data currently resides that was setup in the Alias Utility.
Username: By default the SYSDBA is the Username.
Password: Enter the password for the SYSDBA.
Server Username and Server Password: Are used when backing up an EUA enabled database. For EUA databases, there's a server-wide SYSDBA user and a database SYSDBA user that are different. Both need to be specified. For non-EUA databases, just the traditional username/password needs to be specified.
Backup Type: Choose Full Backup, Full Dump, or Incremental Dump. (For more details on the Full Dump and Incremental Dump options, please refer to the Disaster Recovery section below.)
Backup To: Enter or search for the drive, medium, or directory to which to backup.
Compress Backup File: Place a checkmark in the Compress Backup File box to compress the backup file.
Encrypt Backup File/Password/Confirm: An option to encrypt and password protect the backup file. If a password is specified during the backup and the backup is being compressed, the resulting zip file will be encrypted using AES 256 encryption.
Note: When restoring a compressed backup that is password-protected, if the user specifies an invalid password, then the restore will fail. If the encryption password is lost, there is currently no method for recovering the password and the encrypted backup cannot be restored.
Validate DB Prior To Backup: The validate option works with both backup and restore steps. Validating on restore is a bit slower, but it ensures that the database is valid. Validating on the backup is much slower than a normal backup and the validation does not fix issues. A database that is restored and fails validation will have the db fail flag set. Users cannot log in until the restore is complete, regardless of whether validation is done.
Disable DB Prior To Backup: Used to ensure access is disabled to the database so that users will not be able to log into it. This is used when moving/restoring the database to another server as a safety measure.
Create a Shortcut: Once the backup utility is set up for the first time, clicking the button creates a shortcut on the desktop that can be used every time backup is performed. All of the settings/options will be retained.
E-mail Notification on ibbackup
There is a backup e-mail notification feature that will send an e-mail to the specified user if a backup fails with an option to send e-mails for completed backups as well.
SETUP PROCESS
1. Go to the Trams program group under Start/All Programs/Trams Back Office/Database Backup and open the backup utility.
2. Ensure the user name and password are filled in
3. Click the Create Shortcut button. The places a backup shortcut on the desktop.
4. Right-click on the backup shortcut on the desktop and select properties.
5. In the Target field right-arrow to the end of the existing information in the field.
6. Add the information in the example below replacing the generic -EMAILSERVER information with the proper e-mail server address and also replace the -EMAILTOADDR information with the proper e-mail address for the recipient.
7. Click OK to save the changes.
Note: If you currently have scheduled backup information in the backup shortcut, append this additional information to the end of that command line.
COMMAND LINE OPTIONS FOR EMAIL NOTIFICATIONS
EMAILSERVER <servername>
EMAILTOADDR <to-address>
EMAILNOTIFYALL
Example: "C:\Program Files\Trams\Common Files\ibbackup.exe" -EMAILSERVER mail.sabre.com -EMAILTOADDR youre-mailaddress@hotmail.com -EMAILNOTIFYALL
The EMAILNOTIFYALL option sends an e-mail for completed backups. If only failed backup notifications are required, eliminate this option.
This feature is only designed for simple SMTP.
- no authentication
- default port: 25
- no TLS/SSL
- no MAPI SUPPORT
New options that pertain to Interbase XE database and higher
New Server username and Server password fields have been added and are used when backing up an EUA enabled database. For EUA databases, there's a server-wide SYSDBA user and a database SYSDBA user that are different. Both need to be specified. For non-EUA databases, just the traditional username/password needs to be specified.
The Backup Type drop-down field contains the following options:
- Full Backup
- Full Dump
- Incremental Dump
Disaster Recovery with Incremental Backups
Interbase XE or higher adds some additional backup options for enabling very fast backups/restores.
Interbase now has an option for what is called an Online Dump. An Online Dump is an exact copy of the database that can be created while the database is in use. The resulting dump file is a complete copy of database at the point in time when the online dump is started, but is in read-only mode.
The initial creation of the dump file can take a few minutes. Once created, we can perform incremental dumps which only update those parts of the original database that have been modified and are typically very fast.
OPTIONS FOR CREATING A BACKUP VIA ONLINE DUMP
--Dump Full: Creates a new Dump file on the server with extension .DMP, overwriting any existing dump file with the same name. The target directory must be located on the server or be on a shared folder that the server can access.
--Dump Incremental: Updates an existing Dump file on the server with any changes since the last Dump Full or Dump Incremental. If the file doesn't already exist, then this works like a Dump Full and a new Dump file is created.
--Dump Full or Dump Incremental. If the file doesn't already exist, then this works like a Dump Full and a new Dump file is created. Dump Full/Incremental creates a file with the same name as the database but ending in .DMP instead of .IB.
We have not automated the process of restoring a dump file, but it's pretty simple:
--Copy the .DMP file to the directory where the database is normally located and rename to .IB.
--Connect to the database via IB Console and change the Read Only property under Options on the General tab of Database Properties from TRUE to FALSE.
CONSIDERATIONS
--The Dump file is an exact copy of the database, except in read-only mode. Any corruption present in the original database, will carry over to the Dump copy. We still recommend creating periodic full backups using the original method.
--The Dump file should be restored within the same version of Interbase that created it. Moving to a newer version of Interbase should be ok, but moving to an older version won't work.
--The Dump file is typically maintained on the same server as the database. We recommend that the Dump file be stored on a separate volume on the server so that a disk failure won't affect both the database and the dump file. It's possible to store the dump file on a separate server, but it requires additional configuration.
--The Online Dump process can run while users are in the system and while a Full Backup is being run.
EXAMPLE BACKUP SCHEDULE FOR TYPICAL LARGE AGENCY
--Every 2 hours during business hours: Incremental Dump
--Daily after hours: Full Backup to external media.
--Weekly after hours: New Full Dump.
The full dump only needs to be done one time. Specify the backup type as Full Dump. Identify where to store the DUMP file. Enter the path in the Backup To field.
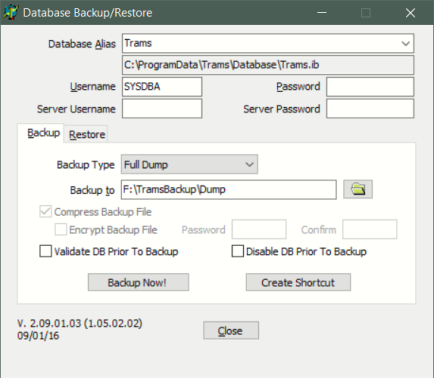
The incremental backup would look almost the same except the Backup Type is set to Incremental:
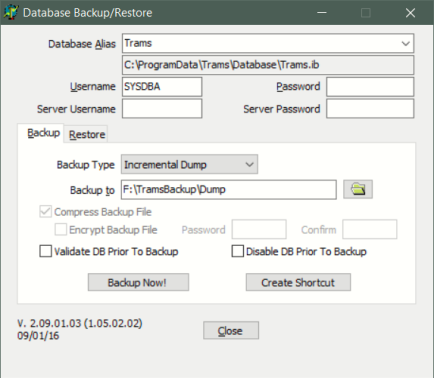
CREATE A SCHEDULED TASK FOR INCREMENTAL DUMP
To create the command line to use in the scheduled task:
1. Click <Create Shortcut>
2. Go to the newly created shortcut, right click on the shortcut icon and select properties
3. Copy the information in the target field
4. Paste the command line in the scheduled task.
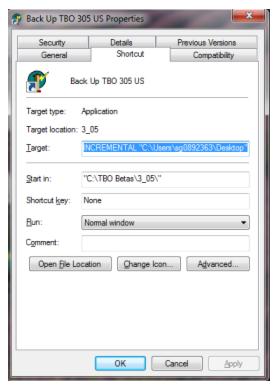
IN THE EVENT OF A DISASTER
1. If there are connections to the affected database, disconnect all connections by shutting down the IBServer service.
2. Copy the .DMP file to the directory where the database is normally located and rename to .IB.
3. Connect to the database via IB Console (see detailed instructions below)
4. Change the Read Only property under Options on the General tab of Database Properties from TRUE to FALSE. (see screen snap in detailed instructions below)
Using IBConsole:
IBConsole is a database management tool included with the Interbase Server installation. The IBConsole.exe shortcut will normally be found in the Interbase XE or higher group in your Programs menu. Double-click to launch IBConsole.
Double-click on the Interbase Servers item in the tree shown on the left side of the form. This will display the Register Server and Connect form.
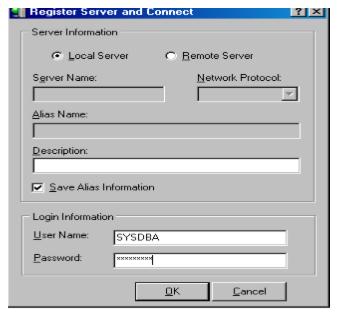
Usually IBConsole is operated on the machine hosting the Interbase database so the default selection of Local Server is typically used. If the database is hosted on a remote machine then select Remote Server, enter the Server Name in DNS or IP format and select the Network Protocol (usually TCP/IP).
In this case it is preferable to use Remote Server, a Server Name of localhost, an appropriate Network Protocol (usually TCP/IP) and an Alias Name to identify the server in the configuration.
Enter the User Name (default administrator User Name is shown, SYSDBA) and password. Press OK to connect to the server using the configuration options shown.
If the connection was successful the configuration in IBConsole will update.

Double-click on Local Server to expand the connection options, shown below.

Right-click on Databases to display the database registration menu.

Select Register to display the Register Database and Connect form.
The actual database file must be specified using this form. Press the file open button to the right of the Database File edit to browse and select the IB file.
Note: When using Remote server connections the file browse button will be disabled, you must manually type in the path and name of the Trams.ib file. Make sure Save Alias Information is checked. Enter the User Name for the database server and the Password in the fields on the form.
Other options can be left at their defaults.
Click OK to connect to the specified database.
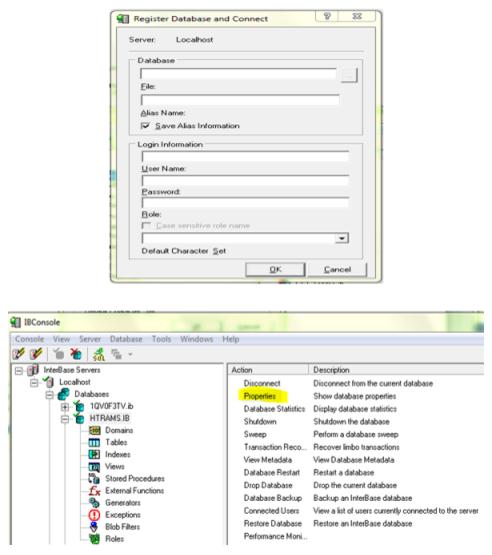
Double-click Properties to display the database properties which are seen below.
GETTING THE PARAMETERS FOR AUTOMATIC BACKUP
Create a shortcut for the backup process on the desktop.
- Start the Trams Backup Utility. You can click on Start, (All) Programs, TRAMS, and Trams Backup Restore or Start, (All) Programs, Trams Back Office, then Database Backup.

2. Make sure the Username is SYSDBA. Enter the appropriate password.
3. Currently, nothing should be entered in Server Username or Server Password.
4. If the desired backup location is not already displayed next to "Backup to," click on the Folder icon to browse to and select the path you wish to back up to.
5. Compress Backup File should normally be checked if you want the backup to be compressed to zip format.
6.Click "Create Shortcut"
At this point, you will have an icon on the desktop named "Backup," plus your alias name. Usually it will be named "Backup TRAMS." When double clicked, it will bring up the same parameters as entered when Create Shortcut was clicked. For the purposes of creating the automatic backup, what we need are these parameters.
1. Right click on this Backup TRAMS shortcut icon on the Desktop and select "Properties".
2. If the text in the Target box is already highlighted right click on the highlighted text and select "Copy."
3. If not, right click inside the Target box, choose "Select All" then follow step 2 to copy the text.
4. Close the Shortcut's properties.
The full copied text will look something like this: "C:\Program Files (x86)\Trams\Common Files\ibbackup.exe" -UserName SYSDBA -EncPwd1 "696D28D2F51DB07CEF" -Alias "TRAMS" "E:\TRAMSBCKUP"
CREATING SCHEDULED TASK WITH WINDOWS TASK SCHEDULER
1. Open up Windows Task Scheduler
Click Start, Programs - Accessories - System Tools - Task Scheduler. Also you can click Start, and type "task" into the Start Menu Search box and Select Task Scheduler from the results, or open the Control Panel - Administrative Tools - Task Scheduler.
- Select 'Create Basic Task' from the right hand pane and the 'Create Basic Task Wizard' will open.
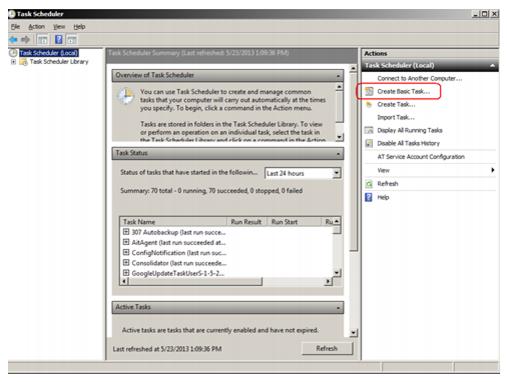
- With the Wizard open, type a 'Name' (example TRAMS Backup) and 'Description' (optional) for this task. Click Next.
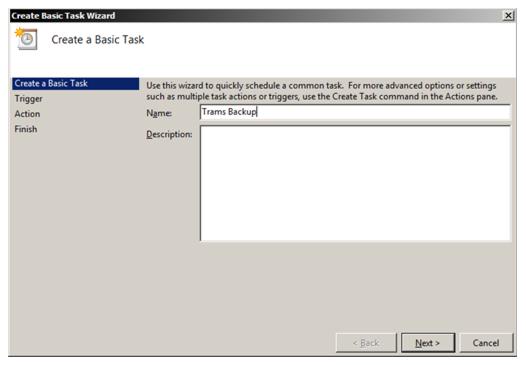
- Select when you would like the event/task to run. Daily would be the most common and logical choice as we recommend a backup be done every day. Click Next.
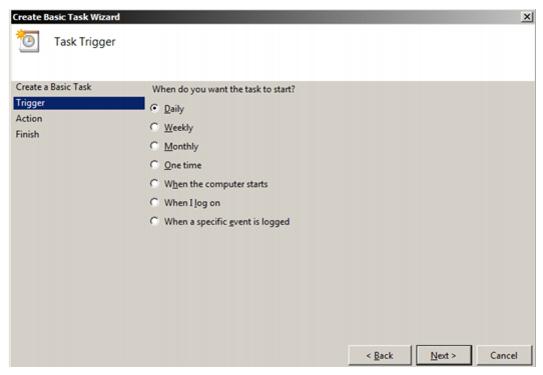
- Select the exact time and date at which you wish the first task to start (each task afterward will run based on your selection in step 4) then click Next. Automated backups are generally run in the evening, rather than during the work day. The computer must be on for the task to occur. Click Next.
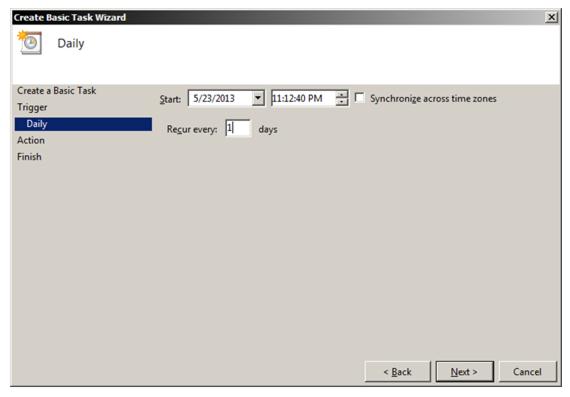
- Leave the action set to "Start a Program" and click Next.
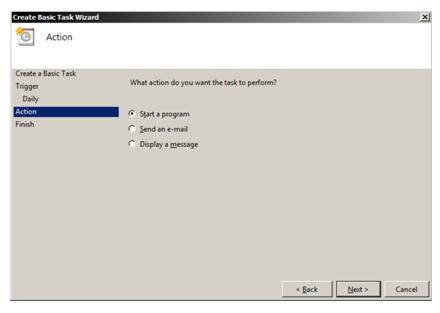
* Note, this next part is a little tricky, please try to follow the steps carefully.
7. We copied the command line for the backup in the steps at the beginning of this document. Unfortunately, we need to split it up into the two boxes on this next screen and make a slight change to the Additional Arguments.
a. First, right click in the Program/script box and select paste.
b. Press the End key on your keyboard.
c. Press the Backspace key to delete characters from the end of what you pasted, until you reach ibbackup.exe" and do not delete the quote mark.
d. What you should have left is this (or something very similar):

e. Alternatively, at this step, you could have clicked Browse… and found the ibbackup.exe program under the C drive, Program Files (x86)\Trams\Common Files.
8. Next, we need to get the correct portion of that command line into the "Add Arguments" box.
a. Right click in the "Add Arguments" box and select paste.
b. Press the Home key on your keyboard.
c. Press the Delete key (not Backspace) until you reach the first dash symbol, do not delete the dash. Next to the dash should be "UserName."
d. With the cursor still at the left side of the box, type "-auto" and a space. What you should see is this:

e.Click Next.
9. Check the box that says "Open the Properties dialog for this task when I click Finish." Click Finish.

10. Check the box that says Run with Highest Privileges.
11. Under the Security options, you can have the task run if the Windows user that created the task is logged on, but it would be more common to set it to "Run whether user is logged on or not." If you set this option, when you click on Okay, it will prompt you to enter your Windows password for this user.
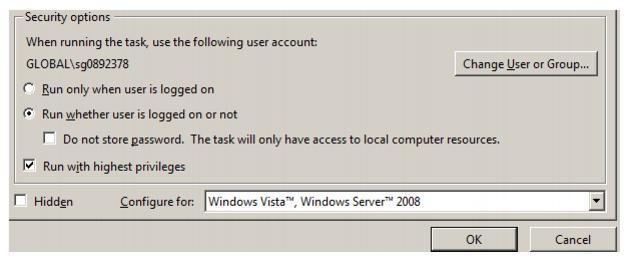
ADDITIONAL SCHEDULED BACKUP COMMAND LINE OPTIONS FOR EUA ENABLED DATABASES
-USERNAME <username>
-PASSWORD <password>
-ALIAS <database alias,database alias,...>
-DBPATH <database path>
-AUTO
-RESTORE
-COMPRESS
-VALIDATE
-DBUSERNAME <database username>
-DBPASSWORD <database password>
-ENCPWD <encrypted password>
-ENCDBPWD <encrypted password>
-DUMPFULL
-DUMPINCREMENTAL
-PAGESIZE <4096, 8192, 16384>
-LOGFILEPATH <path for log file>
-EMAILSERVER <email server name>
-EMAILTOADDR <recipient's email address>
-EMAILNOTIFYALL
Back Up Reports/Spool Directory/s
When backing up the TBO database, the Report Directory or the Spool Directory/s are NOT backed up. Make a separate backup for all TBO reports and the spool directory/s. The easiest way to do this is to use the following instructions:
1. Select Start|Programs|Accessories|System Tools|Backup.
2. Follow the Backup Wizard, and place a checkmark in the Trams Reports folder found where the TRAMS Reports where installed in the Trams program group.
3. Then, browse for the backup destination found on the bottom of the backup screen. (Some versions of Windows may have the backup destination on the next screen.)
4. Click on Start Backup to start backing up, or Schedule Jobs. (If selecting Schedule Jobs, backup files will be backed up as scheduled. Make sure that to backup to a CB-RW or a USB Drive, etc., and that the system time and data are correct when using this option.)
5. Repeat the process for the Spool Directory/s.
Restore
NEVER restore the Trams.ib until the backup has been restored some place else by following the procedures outlined below. The agency may be instructed by our support department to do a backup and then restore the database. This could be to re-index certain database tables or to troubleshoot some other issue. In any event, following these steps will ensure the integrity of the database backup, and will alleviate the possibility of restoring over an existing database. These steps should work for any version of Interbase, but not for doing an upgrade of Interbase.
Close out of TBO (and ClientBase) to restore data.
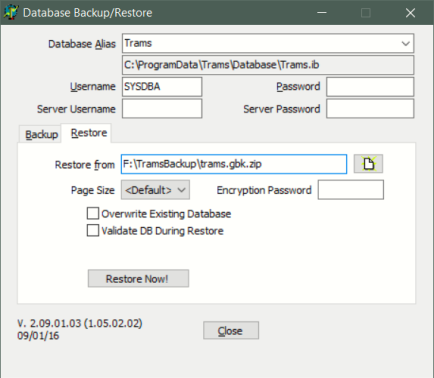
Select the Restore Tab. The restore function recovers backup data saved on medium that used the Trams backup function. Restore replaces current data files with those on the backup medium. This restore program restores both Trams Back Office and ClientBase Data. Since the two programs share a common database, restore cannot be done on one without affecting the other.
1) Make sure everyone is out of ClientBase, Trams Back Office and any other applications connecting to the database.
2) If the database is a Sync database, please go to scheduled tasks in the Control Panel in Windows. If the task that controls synchronization is currently running, please wait for it to finish (refresh the screen). Once it is not running (status Ready), disable the task by double- clicking it and un-checking the box that says Enabled and then clicking Apply/Okay.
3) Perform a backup of the database.
4) Shut down the Interbase Guardian service. Go to Control Panel|Administrative Tools|Services and then highlighting Interbase Guardian and clicking Stop Service. This will automatically stop the Interbase Server service as well.
5) In Windows Explorer go where the Trams.ib is located and rename it from Trams.ib to Trams.ib.old.
6) Start the Interbase Guardian Service (as before, the Interbase Server service will be updated automatically).
7) Restore the backup that was done in Step 2. It should not prompt that it's overwriting an existing database. Go to Start|Programs|Trams Back Office|Database Backup. Click on the Restore tab.
Database Alias: Database Alias from the drop-down. This is the database which will be backed up.
Database Path: By default below the Database Alias is the path where the data currently resides. This was setup in the Alias Utility.
Username: By default the SYSDBA is the Username.
Password: Enter the password for the SYSDBA.
Server Username/Server Password: In preparation for Password Management enhancements in ClientBase Windows and Trams Back Office, there are new fields on the Backup Utility called Server Username and Server Password. These fields should be left blank when performing a backup or restore.
Restore From: Enter or search for the drive, medium, or directory to which the backup was performed and find the Trams.gbk.zip file.
Page Size: The Page Size option with choices <default>, 4K, 8K and 16K (for Interbase 2007 and higher) are for users who have Interbase 2007 installed. Restoring a database with a larger page size results in a performance increase in the database. Typically the time needed for the database to send data requested by the application has been decreased up to 10% (comparing 4kb to 16 kb page size).
Encrypt Password: Type the password used when backing up and encrypting the database. When restoring a compressed backup that is password-protected, if the user specifies an invalid password, then the restore will fail. Note: When restoring a compressed backup that is password-protected, if the user specifies an invalid password, then the restore will fail. If the encryption password is lost, there is currently no method for recovering the password and the encrypted backup cannot be restored.
Validate DB prior To Backup/Restore: The validate option works with both backup and restore steps. Validating on restore is a bit slower, but it ensures that the database is valid. Validating on the backup is much slower than a normal backup and the validation does not fix issues. A database that is restored and fails validation will have the db fail flag set. Users cannot log in until the restore is complete, regardless of whether validation is done.Overwrite Existing Database: Check here to overwrite the existing database.
8) Once verifying that the restore completed successfully, have everyone go back into TBO and/or ClientBase. (Leave the renamed database and the backup in place until everyone is satisfied that the system is working correctly).
9) If the Sync scheduled task was disabled in Step 2, go back into the sync task's properties and enable it.
If there are any questions about these steps or there is any difficulty in following them, don't hesitate to contact our support department.
Calculator
Access the calculator from this menu. Many of our customers find it convenient to access the calculator when they sign into Trams Back Office each day. By minimizing and sending it to the tool bar, there is quick access to the calculator.
Use the keyboard’s number pad to calculate numbers and do a <Ctrl C> to copy the figure from the calculator’s display screen. When in Trams Back Office, put the cursor in the field where the figure will go, and press <Ctrl V> (or right mouse click and select paste) to paste the amount.
Purge
Purge automatically deletes/voids files in the system that may no longer be of use.
PNR History
On each interfaced invoice, Trams Back Office keeps a "receipt" showing the interface formats used to create that invoice. Over time, these files can build up and take up needed disk space, not only on the computer hard drive, but on the back-up medium as well. Located under Utilities|Purge|PNR History, Purge deletes PNR History. PNR History is the information displayed when selecting the "Rec Loc" button at the top of each invoice. If choosing to purge PNR history, only purge through the last closed and balanced month. If not keeping a general ledger in Trams Back Office, only purge through the last closed and reconciled ARC period.
Once the purge has completed, a backup restore routine must be performed to complete the routine. Steps below outline how to restore to a new alias (not over the current production database) as a precautionary
To Purge Data
1. Create a backup file and store it.
2. Go to Utilities|Purge|PNR History. Enter the date to include in the purge. All interfaced PNR History residing under the "Rec Loc" button prior to the date entered will be purged. For example, if entering a purge through date of 01/01/12, all interfaced PNR history from the beginning of the time the agency has been using Trams Back Office through 01/01/12 is purged.
3. If the agency is using the ClientBase Synchronization Routine, it is important to disable the Sync Scheduled Task prior to running the second back up routine in step 3.
3. Create a new backup file (after the purge is complete). Because one should never restore a backup over an existing database, a new alias path must be created to restore the backup file to.
4. Launch the Alias Utility by going to Start|Programs|Trams Back Office|Alias Utility.
5. Highlight the existing Trams Alias and click modify.
6. Change the Alias Name to Old Trams.
7. Highlight the Alias Path and copy the path (Ctrl C) and close the window for that alias.
8. Create a new alias path while still in the Alias Utility, and click Add. Type in a new Alias Name (suggest Trams). In the path field, paste the alias path copied in step 7 (Ctrl V).
9. Using the Trams Backup/Restore Utility, restore the backup file created in step 3 to the new alias path.
10. Rename the old database. Go to My Computer C:\Program files\Trams\database and rename the old database (.gdb or .ib) to Trams.old.
11. In the Alias Utility, delete the alias path that points to the old database (with the PNR History un-purged.
12. Enable the Sync Scheduled Task.
Once history is purged, it is gone. There is no way to recover this data. Prior to purging history, always be sure to do a backup. Keep this backup in a safe place, so if there is a need to retrieve any of the purged history, restore the backup.
Globally Void Open Comm Track Bookings
Located under Utilities|Purge|Open Comm Track Bookings is a feature to globally void Open Commission Track Bookings by Latest Invoice Issue Date, Branch, and Travel Type. These bookings can build up and remain open until they are voided. If sending out Vendor Statements each month, this feature enables the agency to send out more accurate statements.
To Globally Void Open Comm Track Bookings
Go to Utilities|Purge|Open Comm Track Bookings
Enter the Latest Invoice Issue Date, Branch and Travel Type/s of the Commission Track bookings to void.
Once these bookings have been voided, it is possible to unvoid them. Locate the invoice which contains the commission track booking using the Invoice Query feature. Select the commission track booking, and click on “Void.” This will unvoid the voided commission track booking.
Note: Always be sure to do a backup before globally modifying invoices.
Purge Credit Card Data
A PCI related credit card purge function is located under Utilities|Purge. When the As Of date is entered, any credit card payments up to the date entered can be changed to the masked format.
Purge Change History
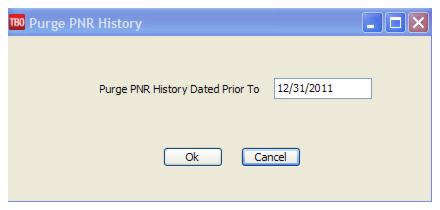
Purge Change History purges changelog history using a prior to date parameter. Purging changelog history helps maintain database size to streamline backup and restore times. After the purge routine is completed, a backup and restore is required to shrink the database size. We strongly recommend that a backup is performed and archived prior to the purge routine as well.
Note: Managers with proper credentials can Purge Change History by entering a SYSDBA password.
To Purge Change History Data
1. Create a backup file and store it.
2. Go to Utilities|Purge|Change History. Enter the date range to include in the purge.
3. If the agency is using the ClientBase Synchronization Routine, it is important to disable the Sync Scheduled Task prior to running the second back up routine in step 3.
4. Create a new backup file (after the purge is complete). Because one should never restore a backup over an existing database, a new alias path must be created to restore the backup file to.
5. Launch the Alias Utility by going to Start|Programs|Trams Back Office|Alias Utility.
6. Highlight the existing Trams Alias and click modify.
7. Change the Alias Name to Old Trams.
8. Highlight the Alias Path and copy the path (Ctrl C) and close the window for that alias.
9. Create a new alias path while still in the Alias Utility, and click Add. Type in a new Alias Name (suggest Trams). In the path field, paste the alias path copied in step 7 (Ctrl V).
10. Using the Trams Backup/Restore Utility, restore the backup file created in step 3 to the new alias path.
11. Rename the old database. Go to My Computer C:\Program files\Trams\database and rename the old database (.gdb or .ib) to Trams.old.
12. In the Alias Utility, delete the alias path that points to the old database (with the Change History un-purged).
13. Enable the Sync Scheduled Task.
Once history is purged, it is gone. There is no way to recover this data. Prior to purging history, always be sure to do a backup. Keep this backup in a safe place, should the need arise to retrieve any of the purged history, it can be restored from the backup.
Important Note: Once change history is purged, when clicking on the history buttons throughout the application the User ID, Date/Time stamp, Action, Field, Old Value, New Value information can no longer be viewed for transactions preceding the prior to date entered.
Purge Interface Logs
To purge the agency’s interface logs which are downloading and processing logs, perform a backup. After this purge is completed, you’ll be restoring the backup to decrease the size of the database. Go to Utilities|Purge|Purge Interface Logs and enter a date you want the files to be purged. Restore the database.
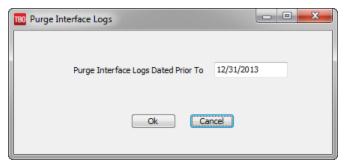
Reopen Period, Purge Posted Journal Entries, Purge Payments/Payables, Purge Invoices
Located under Utilities|Purge, there is a required order that must be followed in order to ultimately purge invoices. All purge routines require a date. An attempt to purge data prior to that date will be made, there are rules where some data may not be purged, details reside each step.
1. Reopen periods.
-- This routine reformats the end of period and year end postings so they become like a standard journal entry in preparation for step 2.
2. Purge Journal Entries.
-- This routine will purge any posted journal entries (including the end of period and year end entries created in step 1 prior to the date designated).
3. Purge Payments/Payables. In order to purge a payment the following rules apply:
-- Only payables that are not linked to a journal entry and have a status of paid will be purged.
-- Payments with a blank date cleared field will not be purged.
-- Once payments are 'purged' the status changes to 'closed' and they no longer have a payment number and will be completely purged with step 4.
4. Purge Invoices. In order to purge an invoice the following rules apply:
-- The Invoice Status cannot be Open.
-- The Partial Payment Amount must equal zero.
-- Invoice and bookings must not reference any payments (See step 3).
-- No bookings can have a client or vendor status of Open.
-- Bookings must not reference a Rescard Reservation.
-- Agent Bookings must not reference a payment.
5. Note: Profiles are not purged
Some Points to Consider Before Purging
* Once data has been purged, reports cannot be run in the purged period.
* * The actual purging of the data may not affect the size of the backup, or the actual size of the database.
Steps for Purging
1) Backup the Trams database and store this backup in for archiving purposes.
2) Test the backup before starting the purge (see section, Procedure for Testing the Integrity of Daily Backup in this chapter).
3) Run and print all General Ledger reports in detail before the purge.
4) Determine the Purge Date. Keep at least two years of data. The date is based on the End of Period date. To purge all data prior to 01/01/2012, the Purge Date is 12/31/2011. All journal entries prior to the purge date must be posted before purging.
Important NOTE: Use the same date for the next 5 steps.
5) Follow the Purging process in sequence starting with Reopen Period. The period to reopen is based on the End of Period and Year End posting dates.
6) Purge the Posted Journal Entries.
7) Purge the Payments/Payables.
8) Purge the Invoices.
9) Before doing any work in the new database, compare the agency's printed reports to the reports in the current database for accuracy.
Enter Access Code
Approximately three weeks before the TBO access code is about to expire, a message will be displayed that the access code is about to expire when logging into TBO. By calling Trams Marketing at 310-641-8726, emailing marketing@Trams.com, obtain the new access code for the existing serial number to enter in this area:
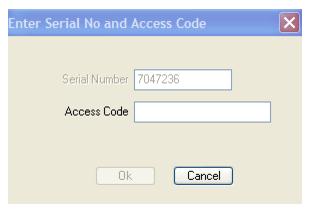
Special Note: When a user’s access to TBO expires, by signing into TBO, have access only the reports under the Reports Menu. There is also access to Utilities|User Access Code. Users should export profiles and other data prior to license expiration. Reports can be mailmerged, printed or exported in a number of formats.
Display Encryption Key
An encryption key is needed by an agency’s Third-Party vendor if they want to display the un-encrypted credit card number. To obtain and encryption key, the agency supervisor or higher needs to send an email to Trams.TBOSuport@sabre.com specifying the Trams Back Office version number and why they need the key. Upon receipt of the key, it is entered under Utilities|Display Encryption Key.
